Showing posts with label vegetables. Show all posts

Tuesday, April 2, 2013

Spicy Baked Pasta with Bacon

Spicy Baked Pasta with Bacon

Several years ago, The Gastronomer went through a baked pasta phase, during which she came up with a number of fantastic variations on the winning formula of a sturdy pasta baked with a white, cheesy sauce and vegetables.  I've recently renewed the tradition with the version presented below, which is currently far and away The Gastronomer's favorite thing to eat for lunch at work.  Between the prep work, sautéing, sauce-making, baking, and inevitable scrubbing when the béchamel burns on the bottom of the pan [not sure why this keeps happening to me--seems like the only way to avoid it is to not quite let the milk boil...], the recipe takes a decent amount of work, but it's worth it because it will feed your family for a week (at least, it will if your family only has two people like ours does, and one of the people only eats the dish once...).  It strikes a great balance between healthy and rich, with plenty of flavor and spice.

Recipe adapted from "Two Pepper Rigatoni and Cheese" by Cooking Light, accessed via myrecipes.com.
  • 16 ounces uncooked whole wheat pasta (rigatoni, penne, or similar)
  • 8 ounces bacon (6 strips), sliced into 1/2" pieces
  • 1 medium white or brown onion, chopped
  • 10-12 ounces fresh spinach
  • 8 ounces frozen peas
  • 3 tablespoons all-purpose flour
  • 3 cups 1% milk
  • 1 cup (4 ounces) shredded jalapeno jack cheese 
  • 1 cup (4 ounces) shredded sharp cheddar cheese
  • 3-4 Thai chilis (or 2 jalapeno peppers), minced
  • 3/4 teaspoon salt
  • 1 tablespoon butter
  • 1 cup Panko breadcrumbs
Preheat oven to 375°.  Cook pasta in salted water until al dente, 1-2 minutes less than stated on package directions. Drain well; place in a large bowl.

Sauté bacon over medium-high heat until cooked through and slightly crisp.  Use a slotted spoon to transfer the bacon to the bowl with the cooked pasta.  Discard most of the bacon grease, saving approximately 1 tablespoon in the skillet for sautéing the onion.  Add the onion and cook over medium heat until it is tender and tastes mild and sweet.  Turn down heat and add spinach in bunches to the pan, stirring until it has cooked down.  Stir in frozen peas.  Transfer contents of skillet to the bowl with the pasta.

Spoon flour into a saucepan. Gradually add milk, stirring with a whisk until smooth. Bring to a boil; cook 2 minutes or until thickened, stirring constantly [as mentioned above, I've found that the milk/flour mixture always burns on the bottom of the pan during this step, even if I stir constantly with a whisk.  This doesn't affect the quality of the sauce, but cleanup is a pain.  Turning off the heat just before the milk boils helps, but I'll keep searching for other remedies.  Maybe our electric stove just adds heat too fast, or maybe it would be better to add butter like in a standard béchamel ...].  Remove milk from heat and add cheeses, stirring until cheeses melt and mixture is smooth. Stir in chilis and salt. Add cheese mixture to pasta, tossing well to coat.  Spoon pasta mixture into a 13 x 9–inch baking dish.

Melt butter in a small bowl. Add Panko breadcrumbs and toss until blended. Sprinkle breadcrumb mixture over pasta mixture. Bake at 375° for 15 minutes or until breadcrumb topping is golden brown.

Yield: 6 to 8 servings
Estimated Start-to-Finish Time: 40 minutes
Actual Start-to-Finish Time: 1 hour 45 minutes
Substitutions: There are many possible modifications one could make to this recipe.  We've tried several different cheese combos  (parmesan, fontina, etc.) with great success and used a number of different vegetables as well.  Most vegetables should be sautéed until they are tender before baking.  Homemade breadcrumbs can be used instead of Panko by following the original Cooking Light recipe.

Monday, February 27, 2012

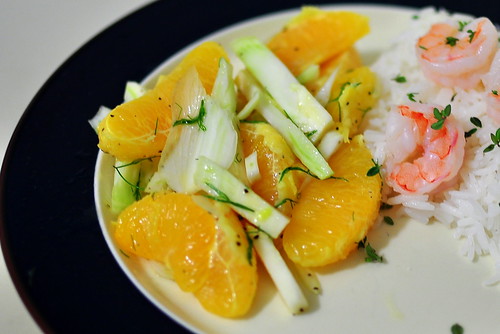
Orange-Fennel Salad

Orange Fennel Salad

The centerpiece of this easy winter salad from Cooking Light's series of recipes with five ingredients or less just might be one of my top five favorite vegetables.  Interestingly, fennel is also an herb and a spice, which perhaps gives it an unfair advantage over its veggie competitors, but I won't count that against it--it's right up there behind corn, carrots, and artichokes and neck and neck with other more obscure flora like upright elephant ears in my personal power rankings.  I find its crispy bulb, dill-like fronds, and licorice-tinged flavor to be positively delightful.  The salad was intended to accompany sauteed snapper but, true to form, we ate it with shrimp instead.

Recipe by Cooking Light, January/February 2010
  • 2 oranges
  • 1 medium fennel bulb with stalks
  • 1 tablespoon olive oil
  • 1/4 teaspoon salt
  • 1/4 teaspoon freshly ground black pepper
Peel and section oranges over a bowl, reserving 2 tablespoons juice. Thinly slice fennel bulb; chop 1 teaspoon fronds. Discard stalks. Place orange sections and sliced fennel in a medium bowl. Combine reserved juice, fronds, olive oil, salt, and pepper in a small bowl, stirring with a whisk. Drizzle juice mixture over fennel mixture; toss well to coat.  Serve with your choice of simply prepared seafood.

Yield: 4 servings
Estimated Start-to-Finish Time: Not Given
Actual Start-to-Finish Time: 30 minutes

Thursday, January 26, 2012

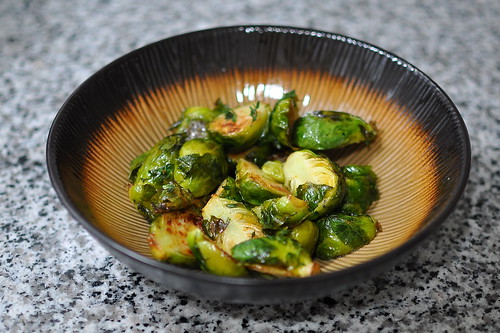
Roasted Brussels Sprouts with Honey, Lemon, and Thyme Dressing

Roasted Brussels Sprouts with Honey, Lemon, and Thyme

Growing up, I viewed brussels sprouts in an extremely negative light. They stank up the house when my mom boiled them, and if I was ever brave enough to actually put one in my mouth, I definitely didn't give it a fair chance to impress. However, in the past couple of years I've come around and realized that they can be one of the most delicious vegetables out there. Maybe it was the brussels sprouts with prosciutto breadcrumbs at Pizzeria Mozza, or the brussels sprouts salad at La Grande Orange... It seems like every time I order brussels sprouts at a restaurant they're amazing. The Gastronomer is a fan as well, so I didn't hesitate to choose this recipe as a side dish for one of her birthday meals. I had never made brussels sprouts at home before, but they turned out to be just as good as in restaurants! As far as vegetable dishes go, this one is just about perfect. Simple, sweet, well-balanced, and even, dare I say, addictive?

Recipe from Olives and Oranges by Sara Jenkins and Mindy Fox, reprinted in Food and Wine's Best of the Best Cookbook Recipes (Vol. 12).
  • 2.5 pounds brussels sprouts, halved lengthwise
  • 3 tablespoons extra-virgin olive oil
  • Kosher salt and freshly ground pepper
  • 3 tablespoons honey
  • 2 tablespoons fresh lemon juice
  • 1 tablespoon fresh thyme leaves
Preheat the oven to 400°F.  In a large bowl, toss the brussels sprouts with 2 tablespoons of the olive oil and season generously with salt and pepper.  Spread the brussels sprouts on a large rimmed baking sheet and roast for about 30 minutes, tossing halfway through, until brown and tender.

In a medium serving bowl, whisk the honey with the lemon juice, thyme, and the remaining 1 tablespoon of olive oil.  Add the brussels sprouts, toss to coat, and serve.

Yield: 6 servings
Estimated Start-to-Finish Time: Not Given
Actual Start-to-Finish Time: 50 minutes
Substitutions: The original recipe recommended a 30 minute cooking time, but my brussels sprouts were well-browned and plenty tender in about 22 minutes.  The authors note that it is a good idea to try to purchase sprouts of uniform size so that they will all take the same amount of time to cook.

Sunday, December 4, 2011

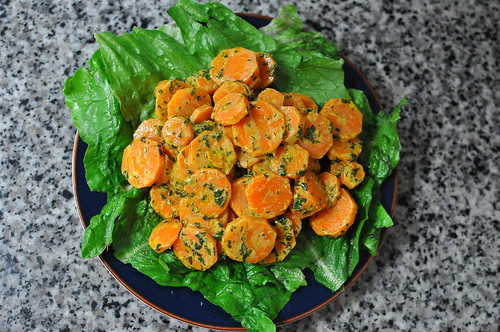
Herbed Carrot Salad

Herbed Carrot Salad

When I was looking for a recipe to try from Flatbreads & Flavors by Jeffrey Alford and Naomi Duguid, the obvious choice would have been to attempt a flatbread. However, for some reason I settled on this selection from the "flavors" portion of the book instead. I think it was the mint--I'm obsessed with herbs. I planned to make this salad as part of a four-course birthday meal for The Gastronomer. When she heard the menu, she asked, "Are you sure you didn't choose that recipe for yourself...?" Indeed, I'm the one who is fond of carrots and the aforementioned mint, so perhaps she had a point. Fortunately, when we sat down to sample the salad, we both LOVED it. I'll definitely be making this one again in short order.

The recipe calls for freshly ground cumin--I'm sure that would make the flavor even bolder, but I used the ground stuff and it still turned out great. I did take advantage of the opportunity to bust out our rarely-used mortar and pestle to muddle the herbs.

Recipe from Flatbreads and Flavors: A Baker's Atlas.
  • 1 teaspoon cumin seed [or ~3/4 teaspoon ground cumin]
  • 3 tablespoons chopped cilantro
  • 2 tablespoons finely chopped mint
  • 1/4 teaspoon salt
  • 3 tablespoons olive oil
  • 2 tablespoons red wine vinegar
  • pinch of sugar
  • 3 tablespoons plain yogurt [I used Trader Joe's nonfat Greek yogurt]
  • 2 pounds carrots, thinly sliced and steamed until just tender
  • Fresh ground black pepper
  • Leaf lettuce for serving

You will need a mortar and pestle or spice grinder, a bowl or glass jar with a lid, and a medium-sized bowl.

In a mortar, grind the cumin seed to a coarse powder. Add the cilantro, mint, and salt, and pound and blend well. Transfer to a bowl or glass jar. Add the oil, vinegar, and sugar and mix well. Alternatively, using a spice grinder, grind the cumin seed. Transfer to a bowl or glass jar and stir in the herbs and salt, pressing the herbs with the back of a spoon to crush them. Add the oil, vinegar, and sugar and mix well. Let stand in a cool place, well sealed for up to 24 hours to allow the flavors to blend.

To prepare the salad, stir the yogurt into the dressing. Transfer to a medium-sized bowl, and add the carrots and pepper to taste. Toss to coat the carrots well. The salad can be served immediately or refrigerated for up to two hours; bring to room temperature before serving. To serve, make a bed of leaf lettuce on a medium-sized plate, and mount the carrots onto the lettuce.

Yield: 6 servings
Estimated Start-to-Finish Time: Not given
Actual Start-to-Finish Time: 1 hour (not counting time for the dressing to marinate)
Substitutions: We sauteed/steamed the carrots with a bit of water in a skillet with a lid on it. The original recipe said to steam the carrots for five minutes, but we found that they were still very crispy at this stage. The Gastronomer likes her carrots pretty soft, so we ended up cooking them much longer.

Sunday, November 6, 2011

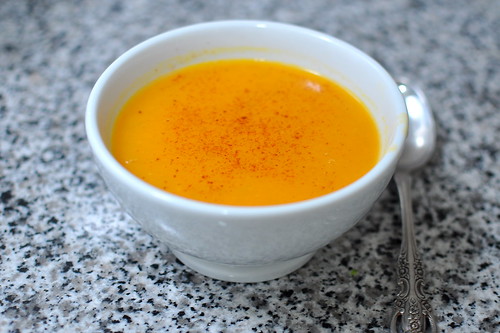
Sweet Potato, Chipotle, and Apple Soup

Sweet Potato, Chipotle, and Apple Soup

As noted previously on the blog, for the Gastronomer's 28th birthday present I promised her a set of five extravagant home-cooked meals. A year before I had given her a similar gift and followed through with all five meals; however, this time after meal #2 she decided that she no longer wanted to spend her Saturdays alone while I slaved away in the kitchen on three- and four-course feasts. She requested that I put the meals on hold. I had come up with some awesome menus which featured recipes from a number of never-before-used cookbooks (our collection is growing faster than we can keep up), so I decided to make the dishes one-by-one on different days.

This soup was supposed to be part of a winter-themed menu. Its flavor was awesome--I'm not a big soup eater, but I was really into it. Additionally, it provided a great opportunity to try the immersion blender that we received as a wedding present [Thanks Diana!]. I skipped the step in the original recipe which called for garnishing with deep-fried tortilla strips, but the soup did go well with some yellow corn tortilla chips we had on hand. Tossing in crumbled up chips made it a bit more substantial--otherwise it was pretty ethereal. I had expected a creamy soup and was surprised by how thin it was.

Recipe from Food & Wine 2009 Annual Cookbook.
  • 2 tablespoons vegetable oil
  • 1/2 medium white onion, finely chopped
  • 2 garlic cloves, smashed
  • 1 teaspoon finely grated fresh ginger
  • 2 Gala apples—peeled, seeded and coarsely chopped
  • 1 celery rib, thinly sliced crosswise
  • 1 3/4 pounds sweet potatoes, peeled and thinly sliced
  • 1 quart chicken stock or low-sodium broth
  • 3 cups water
  • 1 small canned chipotle in adobo sauce, seeded and minced
  • salt and pepper
  • 1/2 teaspoon cinnamon
  • 1/2 teaspoon sugar
  • Corn tortilla chips
In a medium soup pot, heat the oil until shimmering. Add the onion, garlic and ginger and cook over low heat, stirring, until softened, about 7 minutes. Add the apples and celery and cook for 5 minutes. Add the sweet potatoes and cook for 5 minutes. Add the chicken stock and water and bring to a boil. Cover partially and simmer over low heat until the fruit and vegetables are very tender, about 45 minutes. Stir in the chipotle.

Puree the soup in the pot using an immersion blender, or transfer it in batches to a normal blender to puree until smooth. Season with 1/4-1/2 teaspoon salt and 1/4 teaspoon pepper.

In a small bowl, mix the cinnamon and sugar with 1/2 teaspoon of salt. Sprinkle over the individual bowls of soup and garnish with broken tortilla chips.

Yield: 6 servings
Estimated Start-to-Finish Time: 1 hour 20 minutes
Actual Start-to-Finish Time: 1 hour 50 minutes
Substitutions: I bought a 1-inch nub of ginger and used it all--you can't have too much ginger if you ask me. I also threw in an extra garlic clove. As noted above, I skipped the step which involved deep-frying tortilla chips in vegetable oil. It didn't seem worth the hassle.

Monday, January 10, 2011

Braised Turnip Greens with Turnips and Apples

Braised Turnip Greens with Turnips and Apples

Although we appreciate fresh local produce and support small family farms in theory, The Gastronomer and I have a notoriously poor track record when it comes to finding our way to farmer's markets on the weekends. Thus I recently decided it was time for us to try a Community Supported Agriculture delivery program. When Christmas came around, along with the hilarious new Stuff White People Like book, I gave The Gastronomer a present to help us be better white people: a subscription to the South Central Farmers CSA co-op. As part of the gift, I promised that I would take charge of figuring out what to do with the bi-weekly bounty of fruit and vegetables.

I picked up our first box at a local church on the Sunday after New Years. We were excited to open it--I expected to find a variety of beautiful winter produce: apples, oranges, squash, brussels sprouts, kale, etc. What we got was a truly staggering quantity of leafy greens, and little else. The lone elements of color in the box came from a large turnip and a bunch of small radishes. It was a bit disappointing, and quite intimidating trying to imagine how we would ever find a way to use it all.

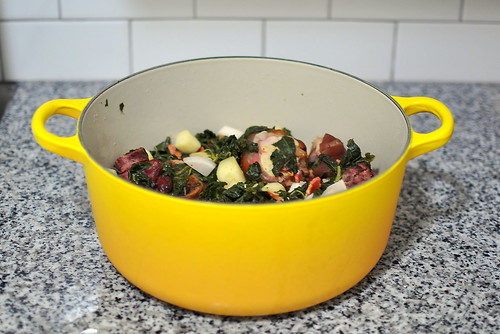
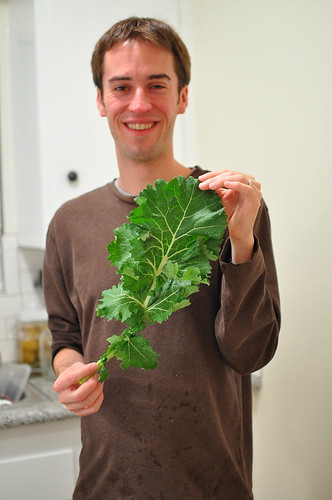
After a bit of research, we had identified all but one of the vegetables in the box, and had started to come across some enticing recipes. I started my farm-fresh cooking adventure by using the turnip and its greens in this recipe. It turned out to be a really fantastic way to get our vitamins while beginning to make a dent in the pile of greenery on our kitchen table. To reach something close to 2 lbs of greens, I added our entire stash of the mystery vegetable, which looked something like green chard but lacked its thick white stem.To help resolve the mystery of the leaf's identity, I'm breaking with tradition and publishing a Stellar Recipes post with two photos.

Mystery Green

Any ideas?

Recipe adapted from Gourmet, November 2009, courtesy of Epicurious.
  • 2 pounds turnip greens or other braising greens (kale, collards, etc.), tough stems discarded and greens torn into small pieces
  • 1 (3/4-to 1-pound) ham hock, rinsed
  • 3 1/2 cups water
  • 3 Gala apples
  • 1 1/4 pounds turnips, peeled and cut into 1/2-inch pieces
  • 2 teaspoons cider vinegar
  • 2 teaspoons sugar
  • 2 tablespoons unsalted butter, cut into pieces
Bring greens, ham hock, water, and 1/4 teaspoon salt to a boil in a large heavy pot. Reduce heat to low and simmer, covered, stirring occasionally, until greens are almost tender, about 20 minutes.

Meanwhile, peel apples and cut into 1/2-inch pieces.

Add turnips and apples to greens with vinegar, sugar, and 1/2 teaspoon each of salt and pepper and cook at a bare simmer, covered, stirring and turning ham hock occasionally, until turnips and apples are tender but not falling apart, about 20 minutes more.

Remove from heat and strain the liquid from the pot into another saucepan. Boil the liquid to reduce it to 1/3 or 1/4 of its original volume, then pour it back into the original pot with the greens. Stir in butter and salt to taste.

Remove ham hock and finely chop any tender meat, discarding skin, bone, and tough meat. Add chopped meat to pot.

Yield: 8 servings
Estimated Start-to-Finish Time: 1 hour
Actual Start-to-Finish Time: 2 hours. It took me forever to wash and tear up the huge quantity of greens--being fresh from the farm, they were quite dirty.
Substitutions: Boiling away some of the liquid was suggested by several reviewers on Epicurious. The dish would have been awfully watery otherwise.

Sunday, November 21, 2010

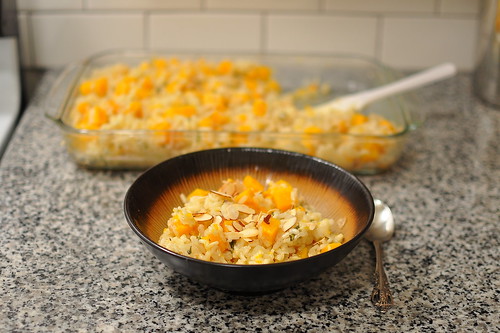
Baked Risotto with Butternut Squash and Sage

BAKED RISOTTO WITH BUTTERNUT SQUASH AND SAGE

Finding a use for leftover ingredients can be a constant struggle in cooking. No one wants to be wasteful, but what are we to do when parsley is only sold in massive bundles, buttermilk is hard to find in containers smaller than one quart, and a single butternut squash is just so bloody big? In our attempts to finish off large boxes of herbs and other such common leftovers, The Gastronomer and I typically find ourselves trekking back to the store for more ingredients to accompany them. This inevitably begets more leftover perishables, and the cycle continues.

This past week, however, the stars aligned for me. The week before we had made a recipe featuring the aforementioned butternut squash, and of course, half of the behemoth was still taking up space in our fridge. While searching through my favorite cookbook for a recipe to use it, I stumbled upon this baked risotto recipe. In addition to sounding delicious and requiring an appropriate portion of butternut squash, it called for fresh sage and chicken broth, both of which we had left over in abundance from The Gastronomer's recent pre-Thanksgiving cooking project. Furthermore, we had several large onions on hand, some leftover white wine, a bag of sliced almonds, just the right amount of Arborio rice, and a Tupperware full of recently-grated Parmesan cheese in the freezer. In a small household such as ours, this was really an astonishing series of coincidences. Clearly, the time was right for this recipe. The risotto turned out fantastic--I'd recommend it even if you don't fortuitously have every single ingredient on hand. Baking risotto is a neat trick to save yourself a half hour of stirring time at the stove while still achieving excellent results.

Recipe by The America's Test Kitchen Family Cookbook
  • 3 1/2 cups low-sodium chicken broth
  • 2 bay leaves
  • 4 tablespoons (1/2 stick) unsalted butter
  • 1 onion, minced
  • salt
  • 2 cups Arborio rice
  • 3 garlic cloves, minced
  • pinch of nutmeg
  • 1/2 cup dry white wine
  • 1 1/2 pounds butternut squash, peeled, seeded, and cut into 1/2-inch pieces
  • 3 teaspoons minced fresh sage
  • 3/4 cup sliced almonds
  • 2 ounces Parmesan cheese, grated (1 cup)
  • pepper
Adjust an over rack to the middle position and preheat the oven to 400 degrees. Bring the broth and bay leaves to a simmer in a medium saucepan over medium-high heat. When little bubbles being rising to the surface but the broth hasn't reached a boil, put a lid on the pan and turn down the heat to the lowest possible setting to keep the broth warm.

Meanwhile, melt the butter in a large saute pan over medium heat. Add the onion and 1/2 teaspoon salt and cook until lightly browned, about 9 minutes. Stir in the rice and cook until the edges begin to turn translucent, about 3 minutes. Stir in the garlic and sprinkle with a pinch of nutmeg, cooking for about 15 seconds, until the garlic is fragrant. Add the wine and cook, stirring frequently, until it is completely absorbed, about 2 minutes.

Spread the rice mixture into a 9 by 13-inch baking dish. Stir in the butternut squash and sage, and top with the warm broth. Bake until the squash and rice are tender and the liquid is absorbed, 30 to 35 minutes.

Place almond slices in a skillet and toast on the stove over medium heat until fragrant (about 5 minutes), shaking the skillet occasionally to prevent them from burning.

After removing the baking dish from the oven, stir in the Parmesan cheese. Season with salt and pepper to taste, and top each serving with toasted almonds.

Yield: 6-8 servings
Estimated Start-to-Finish time: 50 minutes
Actual Start-to-Finish time: 1 hour 15 minutes
Substitutions: The original recipe only called for 1 1/2 teaspoon minced sage, but I used over a tablespoon. The Gastronomer and I thought we could have used even more sage flavor. I didn't weigh the butternut squash but used the whole 1/2 squash that I had on hand. The original recipe listed 1/8 teaspoon saffron as a optional ingredient--I didn't have any and left it out. The extra complexity would have probably been missed more in the simpler variation on the recipe that didn't include squash, sage, and almonds.

Wednesday, October 27, 2010

Middle Eastern Lentil Soup

MIDDLE EASTERN LENTIL SOUP

For days when you feel like eating extra healthy, you really can't beat a lentil soup. Every 35 g serving of green lentils has 11 g of fiber, 10 g of protein, and no fat. Pretty incredible. I chose this recipe, courtesy of fatfreevegan.com, because of it contains a stellar array of spices---I always get excited about diving into our spice cabinet. When I first finished making it and dug into a bowl, I found it to be a bit unsatisfying; the total absence of sweetness or richness hit me harder than I had anticipated. However, it held up better the next day, when I wasn't so tired from cooking and in need of some truly hearty sustenance. It would make a meager entree, but as a side dish or replacing a salad before a meal, this soup is really quite delicious.

Recipe adapted from fatfreevegan.com
  • 2 cups chopped onion
  • 3 cloves garlic, minced
  • 2 zucchini, chopped in 1/4 - 1/2 inch pieces
  • Other vegetables such as eggplant, if desired
  • 5 1/2 cups water
  • 1/2 teaspoon coriander
  • 1/4 teaspoon cardamom
  • 1 teaspoon ground turmeric
  • 3/4 teaspoon ground cumin
  • 1/2 teaspoon ground ginger
  • 1/4 teaspoon freshly ground black pepper
  • 1/8 teaspoon cayenne pepper
  • 1 1/2 cups lentils
  • 2 tablespoons chopped fresh parsley (optional)
  • 3/4 teaspoon salt, or to taste
  • 1 tablespoon lemon juice or 1 teaspoon sumac
In a large pot, sauté the onion and garlic in 1/2 cup of the water for about 3 minutes. Add the zucchini and any additional vegetables and saute for 3 more minutes. Stir in the spices and cook for 1 minute. Add the lentils and the remaining water. Simmer the soup for about 30 minutes, or until the lentils are cooked (the time may depend on what kind of lentils you are using). Stir in the salt, and add the parsley. Just before serving, stir in the lemon juice or sprinkle each bowl of soup with a little sumac.

Yield: 4 servings
Estimated Start-to-Finish time: Not given
Actual Start-to-Finish time: 1 hour 5 minutes
Substitutions: The original recipe called for red lentils, but I couldn't find any so I used normal yellow/green ones, which are much more fibrous anyway. I didn't have any coriander or turmeric on hand, and I decided that purchasing one new spice for this simple weeknight recipe was enough. Deeming turmeric to be more important (if nothing else, the color of the dish would have been totally different without it), I left out the coriander. I added a bit of extra cumin to replace it. I took the easy way out and used lemon juice instead of sumac. If I make this again, I might try to find some---I'm curious what it's like.

Saturday, June 12, 2010

Seared Scallops with Bacon and Spinach

PAN-SEARED SCALLOPS WITH BACON AND SPINACH

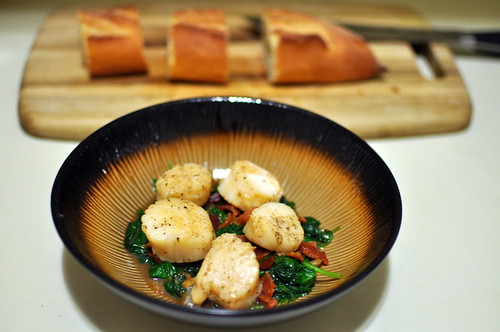
When it's not a special occasion, I typically shy away from buying scallops because they're so darn expensive. However, I recently decided to give Trader Joe's frozen New England wild jumbo scallops a try. They're relatively reasonably priced, and my understanding is that most "fresh" seafood sold in grocery stores has in fact already been frozen and defrosted, so I figured they might be just as good. I wasn't disappointed--these were comparable in flavor and tenderness to scallops I've had in restaurants, if not quite as enormous (one pound was about 18 scallops). I wasn't really able to achieve the intended crispy sear because the skillet filled up with liquid once I put the scallops in---it was like sauteing tofu. I should have pressed the scallops dry more aggressively before cooking, but I suspect that my real problem was not quite giving them enough time to fully defrost in the fridge before cooking. However, I avoided overcooking them (priority #1 when working with scallops or shrimp), and they were still a pleasure to eat atop the delicious bed of bacon-infused spinach.

Recipe by Cooking Light, May 2010
  • 3 center-cut bacon slices
  • 1 1/2 pounds jumbo sea scallops
  • 1/4 teaspoon plus 1/8 teaspoon kosher salt, divided
  • 1/4 teaspoon freshly ground black pepper, divided
  • 1 cup chopped onion
  • 6 garlic cloves, sliced
  • 12 ounces fresh baby spinach
  • 4 lemon wedges (optional)

Cook bacon in a large cast-iron skillet over medium-high heat until crisp. Remove bacon from pan, reserving 1 tablespoon drippings in pan; coarsely chop and set bacon aside. Increase heat to high.

Pat scallops dry with paper towels. Sprinkle scallops evenly with 1/4 teaspoon salt and 1/8 teaspoon pepper. Add scallops to drippings in pan; cook 2 1/2 minutes on each side or until done. Transfer to a plate; keep warm. Reduce heat to medium-high. Add onion and garlic to pan; sauté 3 minutes, stirring frequently. Add half of spinach; cook 1 minute, stirring frequently. Add remaining half of spinach; cook 2 minutes or just until wilted, stirring frequently. Remove from heat; stir in remaining 1/8 teaspoon salt and remaining 1/8 teaspoon pepper.

Divide spinach mixture among 4 plates; top each serving evenly with crumbled bacon and 3 scallops. Serve immediately with lemon wedges and a toasted baguette.

Yield: 4 servings
Estimated Start-to-Finish Time: Not given
Actual Start-to-Finish Time: 1 hour 15 minutes
Substitutions: I went ahead and left all of the bacon fat in the skillet while cooking the other ingredients. In keeping with their mission, Cooking Light tends to avoid using any fats, salts, etc. that aren't absolutely necessary, but I figured it couldn't hurt to have everything taste extra bacon-y.

Friday, December 11, 2009

Spaghetti with Spinach and Anchovies

SPINACH AND ANCHOVY PASTA

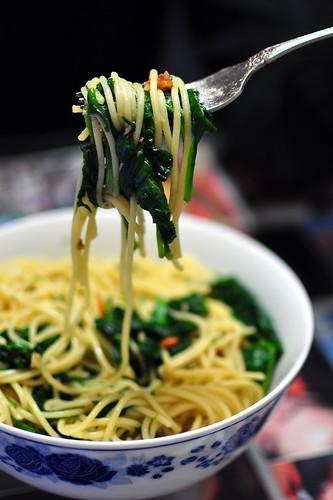
This dish makes an excellent weeknight dinner. It's very fast, and the flavors are simple but satisfying. I like spinach fine, but generally prefer its flavor to be kept in the background. However, in this dish it really works well with the garlic and anchovies. I was glad I splurged for pine nuts--they really do add to the experience. The recipe calls for capelli, which as far as I could tell from the pictures is indistinguishable from spaghetti. I'll wait for an Italian to correct me...

Recipe adopted from Pasta: A cook's guide to the delicious world of pasta and noodles with 500 recipes
  • 1 1/4 lbs fresh flat-leaf spinach or 3/4 lb frozen spinach
  • 1 lb capelli d'angelo
  • 4 tablespoons olive oil
  • 3 tablespoons pine nuts
  • 3 garlic cloves, minced
  • 1 can (~ 2 oz.) anchovy fillets, chopped
Wash the spinach thoroughly in a colander and place it in a large pot with only the water that naturally clings to the leaves. Cover and cook over high heat, shaking occasionally, until the leaves had just wilted and the spinach is bright green. Drain well and set aside.

Cook the pasta in lightly salted water. Meanwhile, heat the olive oil in a saucepan, add the pine nuts, and fry until golden brown. Remove with a slotted spoon and set aside (if you don't have slotted spoon, a fork works in a pinch). Add the garlic to the pan and fry until golden. Add the anchovies, then the spinach, and cook for 2-3 minutes, or until the spinach is hot. Stir in the pine nuts. Drain the pasta and toss in a serving bowl with butter or olive oil. Top with the sauce, fork it through roughly and serve.

Yield: 4 servings
Estimated Start-to-Finish Time: Not given
Actual Start-to-Finish Time: 50 minutes
Substitutions: The proportions seemed a bit skewed in the original recipe, which called for 2 lbs of fresh spinach, 2 garlic cloves, and 6 anchovy fillets. 2 lbs appeared to be an enormous quantity of spinach--I could barely fit 1 1/4 pound in my pot--but having seen it cook down and tasted the final product, I'd say adding a bit more would have been fine. Maybe the anchovy fillets in Britain are bigger than ours, because 6 wouldn't have been nearly enough. Even though I used a whole can, which turned out to be 15 fillets, The Gastronomer wished that the pasta had been fishier.

Saturday, December 5, 2009

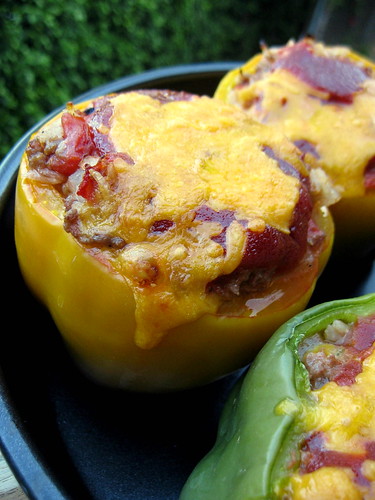
Stuffed Bell Peppers

STUFFED BELL PEPPERS

Of all the recipes I made for The Gastronomer's 2008 Christmas present, these bell peppers may have been her favorite. She frequently requests that I make them again, and once when I was out of town she ate them for four meals straight. The original appeal for me was the apparent intricacy of stuffing meat inside a vegetable, but in fact they're a classic American dish that's quite easy to execute. The recipe's success can be largely attributed to the following theorem:

ground beef + cheese + ketchup = delicious

which has been experimentally confirmed over 10^9 times. However, there is some added complexity here which is far above the intellectual level of a fast food hamburger.

Recipe by The America's Test Kitchen Family Cookbook
  • Salt
  • 4 red, yellow, or orange bell peppers (6 oz each)
  • 1/2 cup long-grain white rice
  • 2 tablespoons olive oil
  • 1 onion, chopped fine
  • 3/4 pound ground beef
  • 3 garlic cloves, minced
  • 1 (14.5 oz) can diced tomatoes, drained with 1/4 cup juice reserved
  • 5 oz Monterey Jack cheese, shredded (1 1/4 cups)
  • 2 tablespoons chopped fresh parsley
  • Pepper
  • 1/4 cup ketchup
Cook the rice by any method you choose. While it is cooking, cut off the top 1/2 inch of the bell peppers and scoop out the insides (it's easy to do with your hand). Bring a pot of salted water to boil, then add the peppers and cook until they begin to soften, about 3 minutes. Remove the peppers from the water and drain.

Heat the olive oil in a large skillet over medium-high heat. Add the onion and cook until softened, about 5 minutes. Stir in the beef and cook until lightly browned, about 5 minutes. Stir in the garlic and cook for about 30 seconds. Transfer the mixture to a large bowl with the rice, and add the tomatoes, 1 cup of the cheese, and the parsley. Season with salt and pepper to taste.

Preheat the oven to 350 degrees. In a small bowl, combine the ketchup and the reserved 1/4 cup tomato juice. Place the peppers, cut side up, in a 9x9 baking dish. Divide the filling mixture evenly among them. Spoon the ketchup mixture over the tops, and sprinkle on the remaining grated cheese. Bake about 30 minutes, or until the cheese is browned.

Yield: 4 servings
Estimated Start-to-Finish Time: 1 hour 20 minutes
Actual Start-to-Finish Time: 1 hour 40 minutes
Substitutions: We often leave out the parsley when making these, and have also tried using Parmesan instead of Monterey Jack Cheese with good results. Adding some extra garlic to the meat mixture never hurts.

Tuesday, December 1, 2009

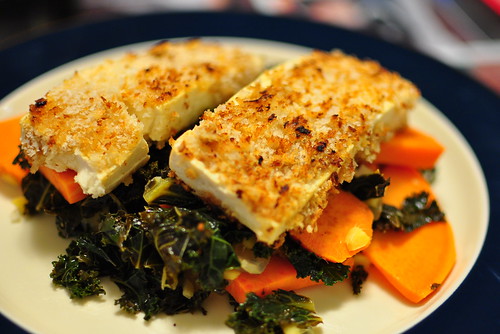
Mustard and Panko-Crusted Tofu with Kale and Yams

PANKO-CRUSTED TOFU WITH KALE AND YAMS

It seems appropriate to follow up a barbecuing post with an uber-healthy vegan recipe. Looking for an alternative to our usual Asian tofu preparations, The Gastronomer and I stumbled upon this recipe on epicurious.com. Aided by The Gastronomer's brilliant suggestion to supplement the prescribed mustard coating on the tofu with Panko bread crumbs, it turned out wonderfully.

Recipe adapted from Bon Appetit, September 2007, courtesy of Epicurious.
  • 1 14-ounce package firm tofu
  • 1/4 cup spicy apple mustard
  • About 1 cup Panko bread crumbs
  • Vegetable oil
  • 1/2 medium onion, chopped
  • 2 tablespoon minced peeled fresh ginger
  • 1 bunch kale, stem cut from each leaf, leaves thinly sliced crosswise (about 8 cups)
  • 1 medium red-skinned sweet potato (yam; about 12 ounces), peeled, halved lengthwise, thinly sliced crosswise
  • 2-3 tablespoons fresh lime juice
Cut tofu into eight 1/2-inch-thick slices. Squeeze the slices between two paper towels to remove some of the moisture from the tofu. Spread both sides of each tofu slice with mustard, then cover them with breadcrumbs (this is easy to accomplish by pouring some breadcrumbs on a plate, then placing the tofu slices on the plate and flipping them over, taking care not to break up the tofu).

Heat about 2 tablespoons vegetable oil in large nonstick skillet over medium-high heat. Add the onion and ginger and sauté 4-5 minutes. Add the kale, sweet potato, and lime juice. Cover, reduce heat to low, and cook until the potatoes are tender and the kale is wilted, 10-20 minutes.

Meanwhile, heat a small amount of vegetable oil in another large nonstick skillet over medium heat. Add the tofu; cover and cook until the bread crumbs are golden, about 2 minutes per side .

Arrange kale and sweet potato mixture on a plate. Overlap tofu slices atop vegetables and serve.

Yield: 4 servings
Estimated Start-to-Finish Time: Not given
Actual Start-to-Finish Time: 1 hour 20 minutes
Substitutions: The original recipe called for 1/2 cup whole grain Dijon mustard--I chose to use spicy apple mustard and found 1/4 cup to be sufficient. I love ginger and used at least 2 tablespoons, while the original recipe only called for 1.

Saturday, November 14, 2009

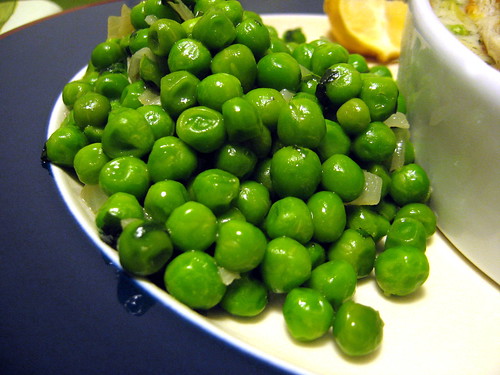
Sauteed Buttery Peas with Mint and Feta Cheese

BUTTERY PEAS

After spending my first 24 years enjoying the fruits of others' labor in the kitchen while rarely making my own contribution to the dinner spread, my culinary career was jump-started when I decided to give The Gastronomer five 3-course dinners as a Christmas present last year. The menus were taken almost exclusively from The America's Test Kitchen Family Cookbook, a fantastic, foolproof resource for the beginning cook. These peas were served alongside salmon and leek pot pies for the main course of Menu #1.

Recipe by The America's Test Kitchen Family Cookbook
  • 2 tablespoons unsalted butter
  • 1 shallot, minced
  • 1 tablespoon minced fresh mint
  • 1 garlic clove, minced
  • 1 pound frozen peas (3 cups)
  • 2 teaspoons sugar
  • 3/4 cup crumbled feta cheese
  • salt and pepper
Melt the butter in a 12-inch nonstick skillet over medium-high heat. Add the shallot, mint, and garlic and cook until softened. Stir in the peas (do not thaw beforehand) and the sugar. The Test Kitchen authors recommend frozen peas for their consistent flavor and ease of use. Cover and cook until the peas are heated through, about 4 minutes. Sprinkle with the feta cheese and season with salt and pepper to taste.

Yield: 4 servings
Estimated Start-to-Finish Time: 10 minutes
Actual Start-to-Finish Time: 20 minutes
Substitutions: We ate some of the peas without the cheese (shown above), as we found that it overwhelmed the flavor of the mint, but both ways were delicious.

Friday, November 13, 2009

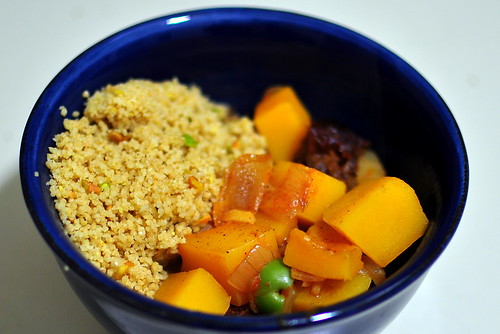
Butternut Squash Tagine with Pistachio Couscous

BUTTERNUT SQUASH TAGINE WITH PISTACHIO COUSCOUS

There's nothing The Gastronomer appreciates more than coming home to a stellar meal after a grueling day at the office, so I'm always on the lookout for simple, delicious recipes for weeknight dinners. Our subscription to Cooking Light (a Christmas present from my mom last year) has been an excellent resource for this. To be honest, this one was pushing it in terms of intricateness (I'm not the most efficient cook--see the time estimates accompanying each post), but it was a great opportunity to finally use our unopened cumin and paprika, and it turned out fantastically.

Recipe by Cooking Light, November 2009

For Butternut Squash Tagine
  • 1 tablespoon olive oil
  • 2 cups chopped onion
  • 2 teaspoons ground cumin
  • 1 teaspoon paprika
  • 1 teaspoon ground turmeric
  • 1/4 teaspoon salt
  • 1/4 teaspoon ground cinnamon
  • 1/4 teaspoon ground ginger
  • 2 garlic cloves, minced
  • 1 pound skinless, boneless chicken breast, cut into bite-sized pieces
  • 2 cups fat-free, less-sodium chicken broth
  • 8 ounces peeled cubed butternut squash
  • 1/3 cup halved pitted picholine olives (about 3 ounces)
  • 8 pitted dried plums, chopped
  • Fresh flat-leaf parsley leaves (optional)
For Pistachio Couscous
  • 3/4 cup fat-free, less-sodium chicken broth
  • 3/4 cup uncooked couscous
  • 1 teaspoon grated lemon rind
  • 1/4 cup chopped pistachios
Make Butternut Squash Tagine

Heat oil in a Dutch oven over medium heat. Add onion; cook 8 minutes or until golden, stirring occasionally. Stir in cumin and next 7 ingredients (through chicken); cook 1 minute, stirring constantly. Stir in broth, squash, olives, and dried plums; bring to a boil. Cover, reduce heat to medium-low, and simmer 10 minutes or until squash is tender. Garnish with parsley, if desired.

Make Pistachio Couscous

Bring chicken broth to boil in a small saucepan. Add couscous; cover and remove from heat. Let stand 5 minutes; fluff with a fork. Stir in grated lemon rind and pistachios.

Yield: 4 servings (serving size: 1 1/4 cups)
Estimated Start-to-Finish Time: 30 minutes
Actual Start-to-Finish Time: 2 hours
Substitutions: I left out the chicken and doubled the butternut squash, and I left out the turmeric because we didn't have any.
Related Posts with Thumbnails