Showing posts with label baked goods. Show all posts

Saturday, December 21, 2013

Palmiers

Palmiers

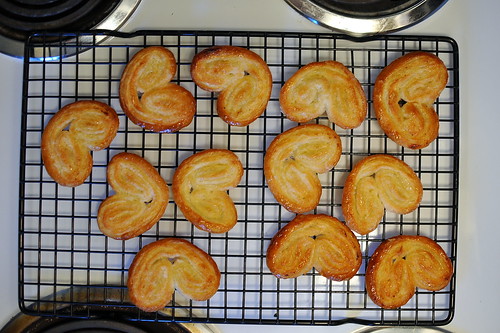
It's becoming something of a Christmas tradition that I make palmiers, French butterfly cookies, for The Gastronomer's family.  The recipe is from Ina Garten of the Food Network, and even though it is of the semi-homemade variety, with the primary ingredient being store-bought puff pastry, the cookies tend to be a hot commodity.  It's an extremely simple recipe, but the execution is a bit delicate--a ruler comes in handy for rolling the dough out to the proper size and folding it accurately, and the cooking times must be very precise because the palmiers brown rapidly.  I've developed a few tricks and tweaks to Garten's recipe to make them come out perfectly, including cutting the amount of sugar nearly in half, which is essential for pleasing my Vietnamese clientele who like desserts that are "not too sweet".  I also couldn't help noticing that some of Garten's measurements don't add up; for instance, clearly if you cut two 13-inch long logs into 3/8-inch slices, you'll end up with ~69 cookies, not 40-45.  1/2-inch slices are probably closer to what she intended--these are thinner than you might think.  One thing that is cool about this recipe (besides the revelation that if you bake puff pastry on its side, it magically grows into a butterfly) is that the sugar on each sides of the dough acts to both sweeten the cookies and keep the puff pastry from sticking to the counter and rolling pin.

Recipe adopted from Ina Garten.
Preheat the oven to 450 degrees F. Combine the sugar and kosher salt. Pour about 3/8 cup of the sugar/salt mixture onto a flat surface such as wooden board or clean countertop, and smooth it into an even rectangle slightly larger than a sheet of puff pastry. Unfold one sheet onto the sugar and pour 1/4 cup of the sugar mixture on top, spreading it evenly on the puff pastry.

With a rolling pin, roll the dough until it's 13 by 13-inches square and the sugar is pressed into the puff pastry on top and bottom. Fold the sides of the square towards the center so they 2/3 of the way towards the middle. Fold them again so the two folds meet exactly at the middle of the dough (I like to set a 12" ruler beside the dough for these steps to guide my folds--if you place the ruler so that the 6" mark lies at the center of the dough and the dough extends about 1/2" past each end of the ruler, then the first set of folds should go to about the 3 3/4" mark on one side and to about 8 1/4" on the other side). Then fold one half over the other half as though closing a book. You will have 6 layers.

Slice the dough into 1/2-inch slices and place the slices, cut side up, on baking sheets lined with parchment paper.  Bake the palmiers for 5 to 5.5 minutes, until the bottoms have just begun to brown.  Remove them from the oven and flip them over with a spatula.  At this stage, the puff pastry will have expanded laterally considerably, but the dough will still be malleable.  Reform the cookies back into tight butterfly shapes by gently pushing on the sides (I use a spatula in one hand and a butter knife in the other).  If you do this at the right time, they will retain their shape for the remainder of the cooking process (this step was pioneered by The Gastronomer).  Return the baking sheets to the oven and bake for 4 more minutes, until the tops are golden brown.  Cool for a few minutes on the cookie sheet and then transfer to a baking rack.

While the first batch of cookies is baking, pour an additional 1/4 cup of sugar onto the working surface (you can re-use whatever sugar remains from the previous batch), and set the second sheet of puff pastry on top of it.  Spread the last 1/4 cup of sugar smoothly onto the top of this sheet, and repeat the rolling out, folding, and baking steps from above.  You can re-use the parchment paper for baking--knock off any pieces of burnt sugar first.

Yield: 48-52 cookies
Estimated Start-to-Finish Time: 35 minutes
Actual Start-to-Finish Time: 1 hour 15 minutes

Sunday, June 9, 2013

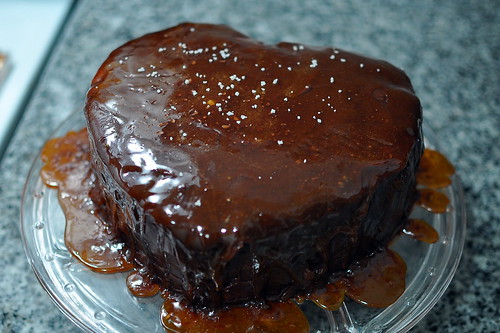
Heart-Shaped Chocolate Caramel Layer Cake

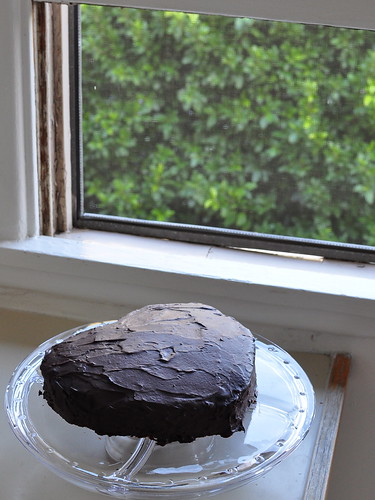
Heart-shaped chocolate caramel layer cake Three years after I first attempted a recipe using our heart-shaped cake ring, I decided it was time to bust it out again for The Gastronomer's anniversary present this year.  I wasn't sure what kind of cake to make, but I figured that pretty much any 8-9 inch layer cake recipe could probably be adapted for the heart-shaped pan.  Fortunately, a few days before showtime, the perfect recipe fell into my lap at the L.A. Times Book Fair.  The Gastronomer and I were unsurprisingly hanging out around the food stage, and we settled in to watch a cooking demo and Q&A by Alex Guarnaschelli.  I was vaguely familiar with her but hadn't really formed much of an opinion during my rare viewings of Iron Chef and Chopped.  Anyway, it turned out that she was HILARIOUS, and impressively able to come up with funny and relevant stories in response to all manner of unscripted audience questions, all while making meatballs and baking an extravagant cake.

The featured cake was this yellow layer cake with chocolate buttercream frosting and caramel topping, which apparently was her favorite childhood birthday cake. Given The Gastronomer's penchant for caramel, I immediately knew that this was the perfect recipe to make into a heart cake.  Fortunately, it was available online from ABC News.

The cake took a long time, partly because I only had one heart-shaped cake ring and thus had to make and bake the batter in two batches, and partly because I was overly cautious at every step (particularly in caramelizing the sugar--this was my first time, and I literally spent 30 minutes with the heat too low and nothing much happening before The Gastronomer came into the kitchen and helped me turn the uneven mixture of candy chunks I had created into an amber caramel sauce).  Nevertheless, it was worth it--the end result was impressive and delicious.  The crunchy candy-like caramel topping was an awesome addition to a traditional layer cake.  Strangely, even though it was basically pure sugar, I thought it balanced out the sweetness of the frosting somehow--usually cakes with this much icing are too much for me.

Recipe courtesy of Alex Guarnaschelli via abcnews.go.com.

For Cake
  • 2 cups all-purpose flour 
  • 2¼ teaspoons baking powder
  • ¾ teaspoon kosher salt
  • 16 tablespoons (2 sticks) lightly salted butter, at room temperature, plus more for greasing the pans
  • 2 cups sugar
  • 6 large eggs
  • Grated zest and juice of 1 lemon
For Frosting
  • 14 ounces bittersweet chocolate, roughly chopped (about 2¾ cups)
  • 1¼ cups sugar
  • ½ teaspoon kosher salt
  • 2 cups heavy cream
  • 1 teaspoon vanilla extract
  • 12 tablespoons (1½ sticks) lightly salted butter, cut into thin slices
For Caramel Topping
  • 1 cup sugar
  • 2 teaspoons light corn syrup
  • Flaky sea salt, such as Maldon (for garnish) 
Make Cake

Preheat the oven to 350°F. Grease two 8-inch round cake pans (or heart-shaped pans!) with butter.  In a bowl, stir together the flour, baking powder, and salt. In the bowl of a stand mixer fitted with the paddle attachment, beat the butter until smooth, 2 to 3 minutes. Add the sugar and continue beating until the mixture becomes fluffy, 5 to 8 minutes. Add the eggs, one by one, taking care that each one is thoroughly integrated before adding the next. Add the lemon zest and lemon juice and then the flour mixture and mix until fully blended. Do not overmix.

Divide the batter between the prepared cake pans. Bake until the centers are firm and the tip of a small knife emerges clean when it pierces the center of each cake, 30 to 40 minutes. Remove from the oven, unmold the cakes, and allow to cool thoroughly on a rack.

Make Frosting and Frost Cake
 
In a medium bowl, combine the chocolate, sugar, and salt. In a medium saucepan, bring the cream and vanilla to a simmer, about 5 minutes. Pour over the chocolate and stir until all of the chocolate has melted. Gently whisk in the butter slices. Set aside to cool.

When the frosting is cool, whip the frosting in the bowl of a stand mixer fitted with a whisk attachment to lighten it, 1 to 2 minutes. Split each cake in half horizontally so you have 4 equal layers. Put the first cake layer on a rack set over a baking sheet, cut side up. Frost the layer and the remaining ones, stacking them neatly and uniformly on top of each other. Frost the entire outside of the cake as well. Refrigerate for at least 30 minutes so it gets cold.

Make Caramel
 
In a large skillet, heat the sugar and corn syrup over medium-low heat until the sugar melts and turns a caramel color. Swirl the sugar gently in the pan as it cooks so it browns evenly. Take the skillet and pour the caramel over the top of the cake, allowing it to drip down the sides and onto the pan below. It is normal that the hot caramel will melt the frosting slightly. Try to pour it in as even and as thin a layer as you can over the cake.  If the caramel cools before pouring, warm it gently over low heat to loosen it again. Allow the caramel topping to cool and harden on top of the cake, at least 5 to 10 minutes before serving, or up to 1 hour. Sprinkle with a pinch of Maldon salt. When ready to slice, use the heel of a knife to crack the caramel top before cutting slices.  Alex Guarnaschelli recommends that the cake shouldn't be refrigerated and should be served at room temperature, but we found that it was also delightful re-heated in the microwave after being stored in the fridge.

Yield: 6 to 8 servings
Estimated Start-to-Finish Time: Not given
Actual Start-to-Finish Time: 3-4 hours

Friday, March 9, 2012

Mustard Batons

Mustard Batons

As a prequel to the Savannah banana pie that I served for dessert on The Gastronomer's recent birthday, I prepared a four-course meal from Dorie Greenspan's Around My French Table.  Greenspan's cookbooks are an internet sensation, but I chose her book of French-inspired recipes for this important cooking project mostly because of how much I enjoyed beggar's linguine, the first recipe that The Gastronomer prepared from Around My French Table earlier this year. Mustard batons were an obvious choice for an appetizer because The Gastronomer had just made a large quantity of gourmet mustard from scratch.  Plus there is nothing that makes me feel more at home in the kitchen than a recipe that requires one to make precise measurements with a ruler.  This is also a perfect recipe to serve as a hors d'oeuvre preceding a multi-course meal because the batons can be prepared ahead of time and frozen, then baked at the last minute.

Although the recipe couldn't be simpler, I found forming the batons to be a little tricky because I had to roll the puff pastry very thin in order to make a rectangle of the suggested dimensions. This led to some breakage when folding the dough in half.  It didn't help that my puff pastry sheet had been hanging out in the freezer a year or so too long and had some crusty corners.  However, The Gastronomer believes there is nothing more noble than using up old ingredients rather than letting them go to waste, so I knew she would appreciate my efforts.  I threw away the bad parts and proceeded with a smaller batch of batons, and the results were quite appealing.  The Gastronomer loved them, although how could she have not when they were made with her mustard?

Recipe from Around My French Table by Dorie Greenspan.
  • 2 sheets frozen puff pastry (each about 8 1/2 ounces), thawed
  • All-purpose flour, for rolling
  • 1/2 cup Dijon mustard [or other mustard]
  • 1 large egg
  • Poppy seeds, for topping (optional)
Position the racks to divide the oven into thirds and preheat the oven to 400 degrees F.  Line two baking sheets with silicone baking mats or parchment paper.  Have a ruler and a pizza cutter (or sharp knife) at hand.

Working with one sheet of pastry at a time, roll the dough out on a lightly floured surface until you have a rectangle that's about 12 x 16 inches.  If necessary, turn the dough so that a short side of the rectangle is closest to you.  Measure the length so that you can find the middle, and spread 1/4 cup of the mustard over the lower half of the dough, stopping about 1/8 inch from the side and bottom edges.  Fold the top portion of the dough over the bottom and cut the pastry from top to bottom into strips about 1 inch wide, then cut the strips crosswise in half (if you prefer, you can leave the strips long).  Carefully transfer the batons to one of the baking sheets and chill or freeze them while you work on the second batch (you can make all the strips to this point and freeze them on baking sheets, then pack them airtight and keep them frozen for up to two months).

Lightly beat the egg with a splash of cold water and brush just the tops of the strips with this glaze.  If you'd like, sprinkle them with poppy seeds.  Bake the batons for 8 minutes.  Rotate the sheet from front to back and top to bottom and bake for another 7 to 8 minutes, or until the strips are puffed and golden brown.  Remove the baking sheets from the oven and let the batons rest for a couple of minutes before serving.

Yield: 40 batons
Estimated Start-to-Finish Time: Not Given
Actual Start-to-Finish Time: 45 minutes
Substitutions: I only made a half a batch (using a single sheet of puff pastry)--I recommend this if you're only serving a small number of people, since the batons are best when they're still warm and crisp from the oven.

Sunday, March 4, 2012

Savannah Banana Pie

Savannah Banana Pie

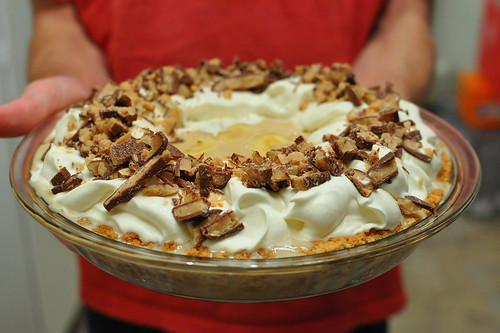
I'm an experienced baker of cookies, cakes, and the like, but the thought of making a pie has always been a bit intimidating to me.  It took a very special occasion, The Gastonomer's 30th birthday, to inspire me to finally attempt my first pie without my mother's assistance.  I flipped through Maida Heatter's book of Pies and Tarts, pondering my options: peach or berry pie (awesome but out of season), apple pie (delicious and classic, but kind of boring), key lime pie (mmm... but choosing a simple graham cracker crust would be shying away from the true challenges of pie crust baking), ... When I saw this recipe, I knew it was perfect.  It didn't have a flaky crust, but bananas, toffee, and caramel are among The Gastronomer's very favorite things in this world. 

Heatter claims that this pie "has several parts to it--all easy and fun--but they do take time."  Nevertheless, there were definitely some technical steps.  Her directions are extremely detailed and clear, but somehow things still went awry.  I could tell as soon as I started pressing my crumb crust into the pan that it was way too buttery--my hands became very greasy as I worked with it, and when I brought it out of the oven after the recommended 8 minutes of baking, it was bubbling madly.  I think the fresh Amaretto cookies that I bought from Whole Foods might have been to blame; Heatter recommends pre-packaged cookies by Lazzaroni.  This wasn't a disaster--I put it back in the oven for 2-3 more minutes and it seemed like everything was going to work out.

However, I ran into more serious trouble when I tried to carry out Heatter's clever procedure for keeping the crust from sticking to the pan (which involves baking the crust with a layer of aluminum foil under it, then freezing it in the pan and removing the foil while the crust is rock hard).  The excess butter seeped through the foil and froze, cementing the foil to the pie pan and to the crust.  I was far worse off than if I hadn't used foil at all.  After several frantic minutes filled with various desperate schemes to get the pie to come loose, I finally succeeded in heating up the bottom of the pie plate enough that the frozen butter melted and I was able to pry the crust out of the pan with only minimal damage.  I then faced another daunting challenge in scraping the sticky foil off the bottom of the crust--a task I delayed for a few minutes by putting the crust back in the freezer to harden up again.  I ultimately did get the foil off and the crust back in the pan mostly intact, save for a few crumbled spots around the edges, and the rest of the recipe went smoothly (incidentally, I attempted Heatter's aluminum foil trick again the next time I tried making a crumb crust, and it worked great, so I don't hold her at fault--I really just think the cookies I used were a bit different than what she had intended for this recipe).

The pie came together and actually looked pretty good in the end, and The Gastronomer was thrilled to be presented with a "birthday cake" that contained so many of her favorite ingredients.  Unfortunately, the pie had a tragic flaw which, ironically, had nothing to do with the crust.  I had presumed that the caramel filling would thicken and set when the pie was chilled, but this did not happen even after many hours in the refrigerator.  The final product was sadly more like a banana caramel soup than a pie.  The Gastronomer reported that it was delicious on the first and second days.  However, it was far too large (and unhealthy) a pie to finish that fast, and by later in the week the runny filling caused the crust to disintegrate.  While we were left with a soggy mess in the end, I enjoyed my first pie-making experience enough that I returned to Heatter's book to try again (with a different recipe) a few weeks later.

Recipe from Maida Heatter's Pies and Tarts.

For Macaroon Crust
For Filling
  • 1 14-ounce can sweetened condensed milk
  • 3 to 4 ripe but not overripe bananas
For Whipped Cream Topping
  • About 3 ounces Almond Roca, English toffee candies, or Heath Bars
  • 1 1/2 cups whipping cream
  • 2 tablespoons confectioners sugar
  • 1/2 teaspoon vanilla extract
  • 1 or 2 drops (only) almond extract
Make Macaroon Crust

Adjust a rack to the middle of the oven and preheat oven to 375 degrees.  Break up the macaroons, then process them in the food processor until they become crumbs.  Add the melted butter and process to mix.  Turn a 9-inch glass pie plate upside down on a work surface, and press a 12-inch square of aluminum foil over the back of it, shiny side down.  Turn the pie plate back over and place the shaped foil into the plate.  Press the foil firmly into place in the plate with a potholder or folded towel.  Fold the edges of the foil down over the rim of the plate.

Turn the crumb mixture into the foil-lined plate.  Using your fingertips, distribute the mixture evenly and loosely over the sides first and then the bottom.  Then press the crust firmly and evenly on the sides, pushing it up from the bottom a bit to form a rim slightly higher than the edge of the pie plate.  Be careful that the top of the crust is not too thin.  After pressing the sides and the top edge firmly, press then remaining crumbs evenly and firmly over the bottom.  There should be no loose crumbs.

Bake for 10 minutes.  Then cool to room temperature.  Freeze the crust in the pie plate for at least 1 hour, overnight if possible. It must be frozen solid. Remove from the freezer.  Raise the edges of the foil and carefully lift the foil (with the crust) from the plate.  Gently peel away the foil as follows: Support the bottom of the crust on your left hand and peel away the foil, a bit at a time (do not tear the foil) with your right hand.  As you do so, rotate the crust gently on your left hand.

Supporting the bottom of the crust with a small metal spatula or a table knife, ease it back into the plate very gently in order not to crack it.  It will not crack or crumble if it has been frozen long enough.  [note that at this point I slide the pie crust onto a flat dinner plate instead and put it back in the freezer, because I needed to use my only glass pie plate for the next step.]

Make Filling

Adjust a rack to the middle of the oven and preheat oven to 425 degrees.  Pour the condensed milk into an 8- or 9-inch Pyrex pie plate.  Cover it airtight with aluminum foil, pressing the edges over the rim of the plate to seal.  Place the plate in a large shallow pan.  Pour hot water about 1/2 inch deep into the large pan and back for 1 hour and 20 to 30 minutes.  The condensed milk will bake to a rich caramel color.  During baking, add more water to the large pan if necessary.  Remove the pie plate from the larger pan, then remove the foil covering and set the caramel aside to cool completely.

From 4 to 8 hours before serving, peel the bananas and cut them crosswise into 1/4 inch slices.  Do the cutting over the crust and let the slices fall into the crust.  Flatten the layer of bananas a bit.  With a teaspoon, place small spoonfuls of the cooled caramelized milk all over the bananas (if you place too much in any one spot you will not have enough to go around).  Then, with the back of a spoon, smooth the top a bit to voer the bananas completely.  Refrigerate for 4-8 hours.

Make Whipped Cream Topping and Assemble Pie

Unwrap the candy and on a cutting board cut down on the candy bars with a small sharp knife to slice the candy thin.  Set it aside.

In a small chilled bowl with chilled beaters whip the cream with the sugar and vanilla and almond extracts only until the cream holds a definite shape but not until it is really stiff.  Place the cream by tablespoonfuls in a circle around the rim of the pie--do not cover the middle of the filling.

Sprinkle the candy over the whipped cream.  Refrigerate and serve very cold.

Yield: 8 servings
Estimated Start-to-Finish Time: Not given
Actual Start-to-Finish Time: 8 hours [I usually leave out chilling time in calculating this, but in this case I was cooking several other dishes at the same time, and I really have no idea how much "active time" there was.  In any case, you'll need to start the recipe at least 8 hours before serving it, and making the crust the night before would be ideal].
Thursday, December 8, 2011

Eat My Blog Charity Bake Sale 2011

Eat My Blog Info Postcard

For those of you in the Los Angeles area, this Saturday is the fourth iteration of the Eat My Blog bake sale benefiting the LA Regional Food Bank. Over 50 talented bakers and restaurants will be contributing an incredible collection of creative, irresistible desserts; you can check out the menu at http://eatmyblogla.wordpress.com/. If you're in the mood for something a bit less avant-garde, but still gourmet, I'll be bringing some very special chocolate chip cookies. Hope to see you there!

Tuesday, June 28, 2011

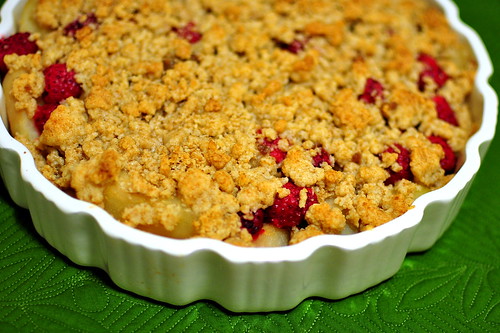
Pear and Raspberry Crumble

Pear and Raspberry Crumble

As I mentioned previously, The Gastronomer tends to acquire cookbooks at a faster rate than she can try out the recipes. Last year, I decided to help her out by attempting at least one dish from each of the neglected books. At the time, this task appeared quite feasible, but since then our collection has swelled by a factor or two or three, and it seems that our cooking progress may never catch up. In any case, one of the cookbooks we received was entitled "Ready, Steady, Spaghetti: Cooking for Kids and with Kids." As we are not kids and rarely cook with them, this book was an excellent candidate to gather dust on the bottom bookshelf, but I resolved to find a recipe suitable for adults and give it a whirl.

This crumble caught my eye, as desserts containing raspberries often do. Being from a children's cookbook, the recipe was quite simple and straightforward; fortunately, this is just how a crumble recipe should be. I served it as a fruity, sweet conclusion to the meal that started with smoked mackerel pate and Filipino pork adobo, and it turned out fantastically. The only downside I could foresee from the perspective of cooking with kids is that the most labor-intensive part of the preparation was peeling and cutting the pears: not the most child-friendly kitchen task. Still, it's hard to find a recipe for which kids can really do all the steps independently, and this one is easy and yields a delicious end product.

Recipe from Ready, Steady, Spaghetti: Cooking for Kids and With Kids.
  • 6 large pears
  • 2 tablespoons sugar
  • 3 star anise (optional)
  • 1 cup raspberries
  • 1 cup all-purpose flour
  • 1/2 cup light brown sugar
  • 2/3 cup unsalted butter, cut into cubes
  • ice cream, to serve
Preheat the oven to 375 degrees F. Peel, quarter, and core the pears, then cut each piece in half lengthwise. Put into a large saucepan and sprinkle with the sugar. Add 1 tablespoon of water and the star anise. Cover and bring to a boil.

Cook, covered, over medium-low heat for 10 minutes, stirring occasionally, until the fruit is tender but still holds its shape. Drain the pears and discard the star anise. Transfer to a large ovenproof baking dish or six 1-cup ramekins. Sprinkle the raspberries over the pears.

Combine the flour, sugar, and butter in a bowl. Use your fingertips to rub the butter into the flour, until the mixture resembles coarse bread crumbs. Sprinkle over the fruit, then bake for 20 to 25 minutes, until golden brown. Leave for 5 minutes, then serve with ice cream.

Yield: 6 servings
Estimated Start-to-Finish Time: Not given
Actual Start-to-Finish Time: 1 hour 20 minutes

Friday, December 3, 2010

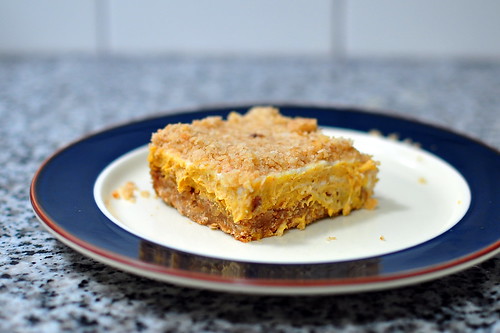
Pumpkin Cheesecake Crumble Squares

PUMPKIN CHEESECAKE CRUMBLE SQUARES

It's time to get excited for the third edition of the Eat My Blog charity bake sale, hosted by The Gastronomer and friends at Tender Greens in West Hollywood (Los Angeles) this Saturday. For the last bake sale in June, I contributed an old family favorite--applesauce spice cake. This time, I wanted to try something new and settled on these pumpkin cheesecake bars. Any recipe with "cheesecake" in the title has the potential to be tricky, so I did a practice run last week. I'm pleased to report that the crumble squares came out great--delicious enough to bring to Thanksgiving dinner with the in-laws.

Get there early on Saturday for the full selection of treats baked by ~70 LA food bloggers and chefs. This is no ordinary bake sale--expect a spread of truly creative, incredible desserts. All proceeds will be donated to the Los Angeles Regional Food Bank. Hope to see you there!

Recipe by Bon Appetit, October 2006, courtesy of Epicurious

For Crust
  • 1 cup all purpose flour
  • 3/4 cup (packed) golden brown sugar
  • 1/2 teaspoon salt
  • 1/2 cup (1 stick) chilled unsalted butter, diced
  • 1 cup pecan halves (about 4 ounces)
  • 3/4 cup old-fashioned oats
For Filling
  • 1 (8-ounce) package cream cheese, room temperature
  • 3/4 cup canned pure pumpkin
  • 1/2 cup sugar
  • 1 large egg
  • 1 1/2 teaspoons ground cinnamon
  • 1 teaspoon ground ginger
For Topping
  • 1 cup sour cream
  • 2 tablespoons sugar
  • 1/4 teaspoon vanilla extract
Make Crust

Preheat oven to 350°F. Generously butter 9x9x2-inch metal baking pan. Line rimmed baking sheet with parchment. Pulse first 4 ingredients in a processor until coarse meal forms. Add pecans; using on/off turns, process until nuts are chopped. Add oats; pulse until mixture is moistened but not clumping. Press 3 1/2 cups crumbs onto bottom of prepared square pan (do not clean processor). Transfer remaining crumbs to lined baking sheet. Bake crumbs on sheet until golden, stirring once, about 12 minutes. Cool crumbs. Bake crust until it is beginning to become golden, about 20-25 minutes. Remove from oven while preparing filling. Maintain oven temperature.

Add Filling

Blend all ingredients in the same food processor until smooth. Spread filling over warm crust; bake until set, dry in center, and beginning to rise at edges, about 20 minutes. Maintain oven temperature.

Add Topping

Mix all ingredients in a small bowl. Spread evenly over hot filling. Bake until topping sets and bubbles at edges, about 5 minutes. Cool completely in pan on rack. Sprinkle crumbs over topping; gently press into topping. Cover; chill until cold, about 2 hours. Can be made 2 days ahead. Keep chilled. Cut into squares.

Yield: 16 bars
Estimated Start-to-Finish Time: Not given
Actual Start-to-Finish Time: 1 hour 45 minutes
Substitutions: I used walnuts in place of pecans since we had a big bag on hand--this worked out fine. The original recipe said to bake the crust for 30 minutes before adding the filling, but I found that it was quite hard after 25 minutes (cutting the bars out of the pan was a bit difficult). Most user reviews on epicurious.com agreed that 30 minutes was too long.

Thursday, October 14, 2010

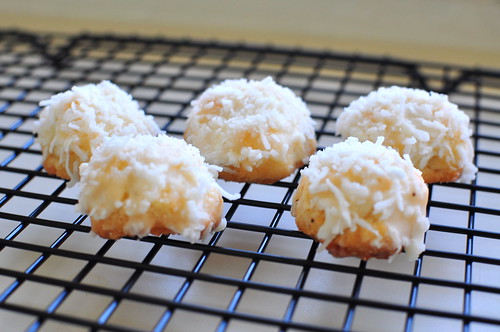
Lime Glazed Coconut Snowballs

LIME GLAZED COCONUT SNOWBALLS

Long-time readers of Stellar Recipes may recall that back in November, I served The Gastronomer smoked salmon canapes, Castilian stew, and rosemary cream biscuits to cap off her 2008 Christmas present. You might have worried that this meal didn't include a sweet finish.... What kind of Christmas present makes the poor recipient forgo dessert? Well, never fear--dessert was indeed served, even if the corresponding blog entry has been a long time coming. These lime-glazed coconut snowballs were a fitting conclusion to a wintry feast.
The Gastronomer particularly loved the sugary lime glaze--fortunately, I had some extra left over for her to eat with a spoon.

Recipe by The America's Test Kitchen Family Cookbook
  • 2 1/2 cups all purpose flour
  • 3/4 cup superfine sugar (if you don't want to buy it, process regular granulated sugar in the food processor for 30 seconds)
  • 1/4 teaspoon salt
  • 2 sticks unsalted butter, cut into 1/2 inch pieces and softened
  • 3 tablespoons cream cheese, softened
  • 2 teaspoons vanilla extract
  • 3 tablespoons lime juice
  • 1 1/2 cups confectioners' sugar
  • 1 1/2 cups sweetened shredded coconut, chopped fine
Whisk the flour, sugar, and salt together in a bowl. Beat the butter into the flour mixture, one piece at a time, using an electric mixer on medium low speed, then continue to beat until the mixture looks crumbly and wet, 1 to 2 minutes. Beat in 2 tablespoons cream cheese and the vanilla until the dough just begins to form large clumps, about 30 seconds.

Knead the dough in the bowl by hand a few times until it forms a large, cohesive mass. Turn the dough out onto a clean counter, divide it in half, and pat into two 4-inch disks. Wrap the disks tightly in plastic wrap and refrigerate for 20-30 minutes.

While the dough is chilling, whisk 2 tablespoons of the lime juice and the remaining 1 tablespoon cream cheese together in a large bowl until smooth. Add the confectioners' sugar and whisk until smooth, adding the remaining lime juice as needed until the glaze is thin enough to spread easily. Adjust the oven racks to the upper- and lower-middle positions and heat the oven to 375 degrees.

Using your hands, roll the dough into 1-inch balls. Place the balls on parchment-lined baking sheets, spacing about 1 1/2 inches apart. Bake until the cookies are light golden brown, about 12 minutes, rotating and switching the baking sheets halfway through baking.

Let the cookies cool on the baking sheets for 3 minutes before transferring them to a wire rack to cool completely, about 30 minutes. Dip the tops the cookies into the glaze and scrape away any excess, then dip into the coconut. Set the cookies back on the wire rack and let stand until the glaze dries and sets, about 20 minutes.

Yield: 40 cookies
Estimated Start-to-Finish Time: 1 hour 40 minutes plus cooling time
Actual Start-to-Finish Time: 2 hours 30 minutes

Tuesday, June 29, 2010

Thyme Popovers

THYME POPOVERS

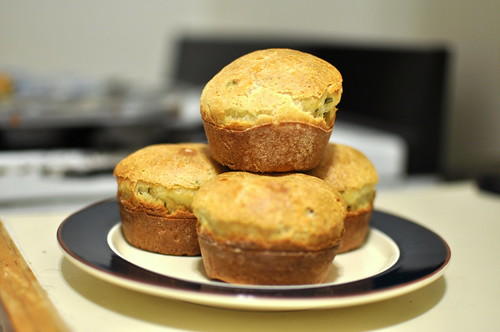
Popovers are pretty cool. Four simple ingredients, flour, butter, eggs, and milk, are transformed into magically airy treats that melt in your mouth like few bread products known to man. Add a bit of salt and minced herbs, and you have an irresistible snack. Even though it was 10:30 p.m. when these came out of the oven, The Gastronomer and I couldn't help eating three each.

Getting them to turn out right is a little tricky--it took me three tries to get satisfactory results, but even the "failures" tasted good. It's important to have the eggs and milk at room temperature before mixing in the flour, and the muffin tins must be coated with cooking spray and then dusted with flour or Parmesan cheese. The popovers' buoyant spirit is such that they try to climb right out of the pan as they cook, and if only cooking spray is used, they can slip and flip over on their sides, ultimately rising crooked. This happened to my first two batches; a dusting of flour on the third try seemed to anchor them enough that they could rise straight. Opening the oven door too early can also cause them to cave in. If you're hard core, there is such thing as a "popover pan", which really maximizes the rising effect.

Recipe adapted from Cooking Light, December 2008.
  • 1 cup all-purpose flour
  • 2 teaspoons minced fresh thyme
  • 1/2 teaspoon salt
  • 1 cup 2% milk
  • 2 large eggs
  • 1 tablespoon butter, melted
  • Cooking spray
Preheat oven to 375°. Combine milk and eggs in a medium bowl, stirring with a whisk until blended; let stand 30 minutes. Combine flour, thyme, and salt, stirring with a whisk. Gradually add flour mixture to milk mixture, stirring well with a whisk. Stir in melted butter.

3. Coat 8 popover cups or muffin tins with cooking spray, then dust them with flour. Divide batter evenly among the prepared tins. Bake at 375° for 30-35 minutes (40 minutes for popover cups) or until golden. Serve immediately.

Yield: 8 popovers
Estimated Start-to-Finish Time: Not given
Actual Start-to-Finish Time: 1 hour 15 minutes
Substitutions: The original recipe called for dusting the popover cups with grated parmesan cheese, and then preheating the cups in the oven for 5 minutes before filling them with batter. I originally guessed that the preheating was just intended to melt the cheese, but I've seen the technique described elsewhere, so there must be more to it than that. In any case, I didn't bother with preheating my muffin tin and my popovers turned out fine, but perhaps they could have been even fluffier. Dusting with flour instead was an idea that came from the popover recipe in my mom's classic Joy of Cooking.

Monday, June 21, 2010

Applesauce Spice Cake

APPLESAUCE SPICE CAKE

Growing up I didn't like icing, but that didn't stop me from loving cakes. When my birthday rolled around, I would always ask my mom to make one of my three favorites: cinnamon coffee cake, chocolate pound cake, or this applesauce spice cake. In recent years I have made it myself several times and gotten rave reviews from The Gastronomer. Thus it seemed like the perfect treat to bake for this past weekend's Eat My Blog charity bake sale. I have to admit that it didn't sell terribly well in the early stages of the bake sale, while competing with such visually arresting treats as Sleeping Baby Cupcakes and Peach Pie Lollipops, but I'd like to think that those who gave my cake a chance were pleased with their purchase. In any case, the bake sale was a tremendous success, raising over $5,400 for the Los Angeles Regional Food Bank, and The Gastronomer and I brought home a dazzling selection of treats baked by LA food bloggers and local restaurants.

The original recipe was called "Grandma Bess's Applesauce Cake", I believe. My mom found it in Joy of Cooking, or a similar classic cookbook.
  • 3 1/2 cups cake flour
  • 2 teaspoons baking soda
  • 1/2 teaspoon salt
  • 3 teaspoons cinnamon
  • 2 teaspoons allspice
  • 2 teaspoons nutmeg
  • 1/2 teaspoon cloves
  • 1 cup butter
  • 2 cups sugar
  • 2 eggs, beaten
  • 2 cups applesauce
Preheat oven to 350 degrees and grease and flour a tube or bundt pan. Sift together twice flour, soda, salt, and spices. In a large bowl, cream butter. Add sugar gradually and cream well. Add beaten eggs; mix well. Add flour mixture alternately with applesauce. Pour into pan and bake for about 1 hour 15 minutes, on until a tester comes out clean. Allow to cool a little before removing from pan.

Yield: ~16 servings
Estimated Start-to-Finish Time: Not given
Actual Start-to-Finish Time: 2 hours

Friday, March 19, 2010

Rosemary Cream Biscuits

ROSEMARY CREAM BISCUIT

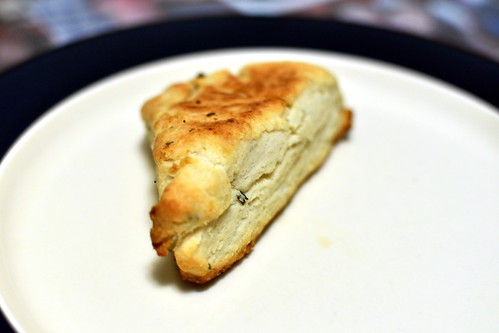
These are great biscuits--certainly not the healthiest bread product out there, but simple and just about perfect in taste and texture. They are extremely easy to make--the step that took me the longest was picking and cutting up the fresh rosemary.

The bottoms of the biscuits were browning a bit too fast, so I had to flip them over for the final five minutes of cooking. This led to a somewhat flattened appearance, but it was worth it to avoid a burnt layer.

Recipe by The America's Test Kitchen Family Cookbook
  • 2 cups all-purpose flour, plus extra for the counter
  • 2 teaspoons sugar
  • 2 teaspoons baking powder
  • 1/2 teaspoon salt
  • 2 tablespoons minced rosemary or other fresh herbs
  • 1 1/2 cups heavy cream
Line a baking sheet with parchment paper and preheat the oven to 450 degrees. Whisk the flour, sugar, baking powder, salt, and herbs together in a large bowl. Stir in the cream with a wooden spoon until the dough forms, about 30 seconds. Turn the dough out onto a lightly floured counter and gather into a ball. Knead briefly until smooth--avoid overworking the dough, as it will make the biscuits tough.

Pat the dough into a 3/4-inch-thick circle. Cut the biscuits into rounds using a 2 1/2-inch biscuit cutter of into 8 wedges using a knife. Place the biscuits on the parchment-lined baking sheet. Bake until golden brown, about 15 minutes.

Yield: 8 biscuits
Estimated Start-to-Finish Time: 30 minutes
Actual Start-to-Finish Time: 45 minutes
Substitutions: I found the dough to be extremely dry and crumbly, so I ended up adding an extra ~1/4 cup of cream.

Sunday, February 14, 2010

Chocolate Heart Layer Cake with Chocolate-Cinnamon Mousse

CHOCOLATE HEART LAYER CAKE WITH CHOCOLATE-CINNAMON MOUSSE

Four years ago at the beginning of February, The Gastronomer sent me an email asking, "Will you please make this cake for Valentine's Day?" She was totally kidding---the recipe was crazy complicated, involving repeated siftings, double boilers, overnight chilling, horizontal cake-cutting, alcohol and tea, mousse and ganache, and a strange baking container known as a "cake ring." I had baked a few cakes in my day, but this recipe was clearly way over my head. In the years that followed, we had a running joke about the heart cake being the most difficult recipe ever. Things got funnier in 2007, when a 12-year old had the audacity to post a review online saying that the recipe was easy. Talk about wounded pride...

After gaining experience and confidence in the kitchen over the past couple of years, I decided this would finally be the year that I tackled the challenge. A few weeks ago I purchased a heart-shaped cake ring and presented it to The Gastronomer on her birthday as a prequel to the Valentine's treat. I made the cake over a two-day period this weekend. The recipe was as complicated as it appeared, but the instructions were mostly quite clear, and while the end product wasn't as beautiful as it could have been (it's apparent that I need some more frosting practice), the flavor was excellent. The combination of chocolate, cherry jam, and chai spices works together really well.

I can assure you that if someone makes this cake for you, they probably love you a lot. Happy Valentine's Day, and chúc mừng năm mới!

Recipe by Bon Appetit, February 2003, courtesy of Epicurious

For Cake
  • 4 tablespoons unsalted butter, melted
  • 1/3 cup all purpose flour
  • 1/3 cup unsweetened cocoa powder
  • 1/4 teaspoon salt
  • 4 large eggs
  • 3/4 cup sugar
For Mousse Base
  • 1 cup heavy whipping cream
  • 4 cinnamon sticks, broken in half
For Mousse
  • 2/3 cup cherry jam
  • 2 tablespoons kirsch (clear cherry brandy)
  • 4 ounces bittersweet (not unsweetened) or semisweet chocolate, finely chopped
For Glaze
  • 1/2 cup heavy whipping cream
  • 1/4 cup water
  • 2 tablespoons light corn syrup
  • 1 teaspoon chai-spiced tea leaves or Lapsang souchong smoked black tea leaves (from 1 tea bag)
  • 5 ounces bittersweet (not unsweetened) or semisweet chocolate, coarsely chopped
Make Mousse Base

Bring whipping cream and cinnamon sticks just to simmer in heavy medium saucepan. Remove from heat; let steep 1 hour at room temperature. Cover and refrigerate cinnamon cream overnight.

Make Cake


Preheat oven to 400°F. Place 8x8x2-inch heart-shaped cake ring on sheet of foil. Wrap foil up sides of ring. Brush foil and inside of ring with 1 tablespoon butter; dust with flour. Place on baking sheet.

Sift flour, cocoa, and salt into medium bowl. Combine eggs and sugar in large metal bowl. Set bowl over saucepan of simmering water (do not allow bottom of bowl to touch water). Whisk until sugar dissolves, about 2 minutes. Remove from over water. Using electric mixer, beat mixture until thick and billowy and heavy ribbon falls when beaters are lifted, about 5 minutes. Sift half of dry ingredients over; fold in gently. Repeat with remaining dry ingredients. Transfer 1/4 cup batter to small bowl; fold in 3 tablespoons butter. Gently fold butter mixture into batter; do not overmix or batter will deflate. Transfer batter to ring.

Bake cake until tester inserted into center comes out clean, about 20 minutes. Transfer cake with foil to rack; cool completely. (Can be made 1 day ahead. Cover and store at room temperature.)

Make Mousse and Glaze and Assemble Cake

Blend jam and kirsch in small bowl. Cut around sides of cake; lift off ring. Using metal spatula, loosen cake from foil and transfer to rack. Using serrated knife, cut cake horizontally in half. Using tart pan bottom, transfer top cake layer to work surface; turn cut side up. Spread half of jam on cut side of both cake layers.

Strain cinnamon cream into large bowl; beat until soft peaks form. Stir finely chopped chocolate in heavy small saucepan over low heat until smooth. Quickly fold warm chocolate into whipped cream (chocolate must be warm to blend smoothly). Immediately drop mousse by dollops over bottom cake layer; spread to within 3/4 inch of edge. Gently press second layer, jam side down, atop mousse. Smooth sides of cake with offset spatula. Chill assembled cake on rack while preparing glaze.

Bring cream, 1/4 cup water, corn syrup, and tea to boil in small saucepan, stirring constantly. Remove from heat; steep 5 minutes. Strain into another small saucepan; return to boil.

Remove from heat. Add coarsely chopped chocolate; whisk until smooth. Cool glaze until thickened, but still pourable, about 30 minutes. Place rack with cake over baking sheet. Slowly pour glaze over cake to cover, using spatula if necessary to spread evenly. Chill until glaze is firm, at least 2 hours and up to 1 day [during this step, it's a good idea to place the cake in an airtight container. I covered mine with a lid, but the bottom layer dried out a bit because it was still sitting on a cooling rack]. Place cake on platter and serve.

Yield: 1 cake
Estimated Start-to-Finish Time: Not given
Actual Start-to-Finish Time: 3 1/2 hours (not counting chilling time--this is a serious project)

Friday, November 27, 2009

Morning Glory Muffins

MORNING GLORY MUFFINS

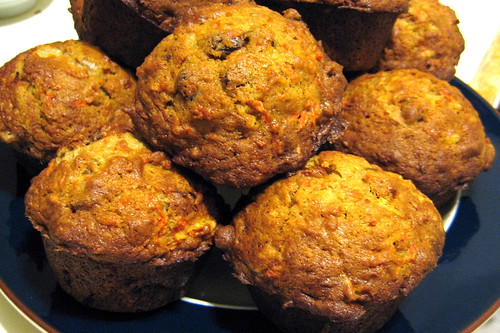
I made these muffins for dessert following the dates stuffed with parmesan, minty buttery peas, and salmon and leek pot pies. The recipe was chosen with The Gastronomer's fondness for fiber in mind, but in hindsight she would have probably preferred to conclude her feast with something a bit more decadent. Even though we were too full after polishing off the pot pies to properly enjoy the muffins, they were great the next day--hearty and satisfying. These were the type of thing I really used to love when I was running 60-70 miles a week and constantly needed to refuel with dense but healthy sources of calories. Now that my fire isn't burning so hot, they don't have such a well-defined place in my life, but they still make a nice breakfast.

Recipe by The America's Test Kitchen Family Cookbook
  • 2 1/4 cups all-purpose flour
  • 2 teaspoons baking soda
  • 1 teaspoon cinnamon
  • 1/2 teaspoon salt
  • 1 1/4 cups sugar
  • 3 large eggs
  • 8 tablespoons (1 stick) unsalted butter, melted and cooled
  • 1 teaspoon vanilla extract
  • 4 carrots, peeled and grated (2 cups)
  • 1 (8-oz) can crushed pineapple, drained and pressed dry with paper towels
  • 1/2 cup sweetened shredded coconut
  • 1/2 cup raisins
  • 1/2 cup walnuts or pecans, toasted and coarsely chopped.
Preheat the oven to 375 degrees, and coat a 12-cup muffin tin with cooking spray. Whisk together the flour, baking soda, cinnamon, and salt in a large bowl. In a separate bowl, whisk together the sugar, eggs, butter, and vanilla until smooth. Fold the egg mixture into the dry ingredients until just combined, then mix in the carrots, pineapple, coconut, raisins, and nuts. Divide the batter evenly among the muffin cups. Bake until the muffins are golden and a toothpick inserted into the center comes out almost clean, 25 to 30 minutes.

Yield: 12 muffins
Estimated Start-to-Finish Time: 1 hour 5 minutes
Actual Start-to-Finish Time: 1 hour 30 minutes
Related Posts with Thumbnails