Thursday, December 22, 2011

Shrimp Piri Piri with Quick-Preserved Meyer Lemons

Shrimp Piri Piri with Quick-Preserved Meyer Lemons

I saved the most traumatic cooking experience of the year for December. It had come time to use the fruits from the young dwarf Meyer lemon tree that the Gastronomer and I have been lovingly caring for since March, and I wanted to make something special. I picked out this recipe from among the La Times' "100 things to do with a Meyer lemon". It sounded right up our alley, and yet different than anything I had ever made before. Our little tree only bore 8.3 smallish lemons this year (1 tiny runt lemon = 0.3 smallish lemons), and I would be using 5.3 of them on this evening, so I really wanted it to turn out well. Unfortunately, the instructions for "quick-preserving" the lemon peels got me quite confused. The recipe said to:

"Return the drained peel to the pan, add the reserved juice, salt and sugar and bring to a boil. Reduce the heat and simmer for 10 minutes. Remove from the heat and set aside to cool. Makes about three-eighths cup."

I presumed that this meant that the mixture of the liquid plus peels was supposed to have reduced to a volume of 3/8 cup. This clearly had not happened after 10 minutes. Having previously experienced that most recipes involving reduction underestimate the amount of time it will take, I continued cooking the peels, ultimately leaving them on the stove for a good 30 minutes. It was only then I realized that using the liquid as part of the sauce could not possibly be the right approach--I put 1/4 cup of salt in there for goodness sakes! Perhaps this would have been obvious to someone who had made traditional preserved lemons before, but it obviously wasn't spelled out clearly enough for me. I took the pot off the stove. I had accomplished my original goal of getting rid of most of the liquid, but what was left was a gloopy mess. The quick-preserved peels were worlds away from the ideal texture and far too salty. I did my best to salvage things by straining what liquid I could out of them, but still feared that I had wasted our precious fruits and would soon be ruining a perfectly good pound of shrimp. I cautiously added less than half of the peels to the marinade mixture and carried on.

Thankfully, this story has a happy ending. I couldn't julienne the peels and garnish the dish with them as instructed, but the end product actually tasted really good! Amazing, even. The shrimp were oh so tasty, and the sauce was not ridiculously salty--it seemed that I had guessed right in the amount of preserved peel I added. I hadn't been sure how much I would like the black rice, but it went together perfectly with the shrimp. This is a really great recipe--every bit as good as it sounded on paper--although there were a couple of additional steps that should have been written more clearly. I'm looking forward to trying it again and really getting everything right.

Recipe adapted from Marcus Samuelsson's The Soul of a New Cuisine by the Los Angeles Times.

For Quick-Preserved Meyer Lemon Peels
  • 6 Meyer lemons
  • 1/4 cup kosher salt
  • 1/4 cup sugar

For Shrimp Piri Piri

  • 1 cup black rice (Forbidden rice) [when uncooked, this looks similar to wild rice, but they are actually quite different]
  • 4 red jalapeño chiles, seeded, ribs removed and chopped [after Whole Foods let me down, I surprisingly found these at Ralphs]
  • 2 green jalapeño chiles, seeded, ribs removed and chopped
  • 2 serrano chiles, seeded, ribs removed and chopped
  • 2 cloves garlic
  • 1/4 cup chopped cilantro, plus additional for garnish
  • 1/4 cup chopped Italian parsley
  • Juice of 1 Meyer lemon
  • 1 recipe quick-preserved Meyer lemon peel, julienned, divided
  • 1/2 cup plus 2 tablespoons olive oil, divided
  • 1 pound medium shrimp, tail-on, peeled and deveined
  • 1/4 teaspoon kosher salt
  • Additional chopped cilantro for garnish

Make Quick-Preserved Meyer Lemon Peels

Using a vegetable peeler, peel the lemons, trying to keep away from the white pith. (If necessary, scrape excess pith away from the peels with a small knife, but a little bit of pith is unavoidable and won't be a problem). Squeeze the juice from the peeled lemons into a bowl and reserve: You should have about 1 cup. Add water to bring the liquid up to 2 cups; set aside to reserve.

Place the peel and 2 cups of water in a saucepan and bring to a rolling boil. Drain. Repeat this procedure once more. Return the drained peel to the pan, add the reserved juice/water mixture, salt and sugar and bring to a boil. Reduce the heat and simmer for 10 minutes. Remove from the heat and set aside. When cool, the pieces of peel can be scooped out of the liquid with a slotted spoon. You should end up with about 3/8 cup of "preserved" peel.

Make Shrimp Piri Piri

In a medium saucepan with a tight-fitting lid, cook the black rice according to the package instructions (about 30 minutes) and reserve.

In a food processor, combine the chiles, garlic, cilantro, parsley, lemon juice and 1/8 cup of the preserved lemon peel and process until the mixture is a coarse paste. Add 1/2 cup olive oil in a slow stream and reserve. (Makes 1 cup.)

In a large bowl, toss the shrimp in the sauce and allow to marinate, covered and refrigerated, for 30 minutes.

Heat the remaining 2 tablespoons olive oil in a large skillet over high heat until it shimmers, then add the marinated shrimp [I'm not sure what the intention was in the original recipe, but I poured in all of the marinade as well and was glad I did--it made a terrific sauce to pour over the rice at the end]. Toss for 3 to 4 minutes until the shrimp is opaque, taking care not to overcook. Season with kosher salt.

Serve the shrimp over the black rice, garnished with the remaining preserved lemon and a little chopped cilantro.

Yield: 4 servings
Estimated Start-to-Finish Time: 1 hour 20 minutes
Actual Start-to-Finish Time: 2 hours 40 minutes
Substitutions: I went ahead and took the tails off the shrimp before marinating and cooking--this made the end product easier to eat, if perhaps slightly less attractive. I also reduced the amount of olive oil to about 1/3 cup to make the recipe a bit less fatty; this still produced a marinade/sauce with an ideal consistency.

Thursday, December 8, 2011

Eat My Blog Charity Bake Sale 2011

Eat My Blog Info Postcard

For those of you in the Los Angeles area, this Saturday is the fourth iteration of the Eat My Blog bake sale benefiting the LA Regional Food Bank. Over 50 talented bakers and restaurants will be contributing an incredible collection of creative, irresistible desserts; you can check out the menu at http://eatmyblogla.wordpress.com/. If you're in the mood for something a bit less avant-garde, but still gourmet, I'll be bringing some very special chocolate chip cookies. Hope to see you there!

Sunday, December 4, 2011

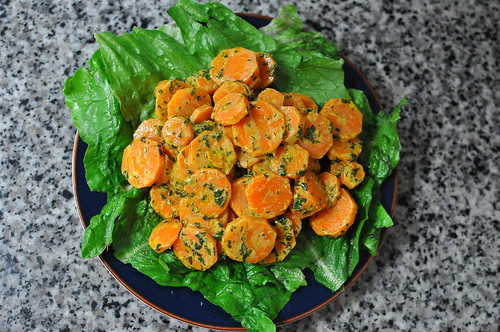
Herbed Carrot Salad

Herbed Carrot Salad

When I was looking for a recipe to try from Flatbreads & Flavors by Jeffrey Alford and Naomi Duguid, the obvious choice would have been to attempt a flatbread. However, for some reason I settled on this selection from the "flavors" portion of the book instead. I think it was the mint--I'm obsessed with herbs. I planned to make this salad as part of a four-course birthday meal for The Gastronomer. When she heard the menu, she asked, "Are you sure you didn't choose that recipe for yourself...?" Indeed, I'm the one who is fond of carrots and the aforementioned mint, so perhaps she had a point. Fortunately, when we sat down to sample the salad, we both LOVED it. I'll definitely be making this one again in short order.

The recipe calls for freshly ground cumin--I'm sure that would make the flavor even bolder, but I used the ground stuff and it still turned out great. I did take advantage of the opportunity to bust out our rarely-used mortar and pestle to muddle the herbs.

Recipe from Flatbreads and Flavors: A Baker's Atlas.
  • 1 teaspoon cumin seed [or ~3/4 teaspoon ground cumin]
  • 3 tablespoons chopped cilantro
  • 2 tablespoons finely chopped mint
  • 1/4 teaspoon salt
  • 3 tablespoons olive oil
  • 2 tablespoons red wine vinegar
  • pinch of sugar
  • 3 tablespoons plain yogurt [I used Trader Joe's nonfat Greek yogurt]
  • 2 pounds carrots, thinly sliced and steamed until just tender
  • Fresh ground black pepper
  • Leaf lettuce for serving

You will need a mortar and pestle or spice grinder, a bowl or glass jar with a lid, and a medium-sized bowl.

In a mortar, grind the cumin seed to a coarse powder. Add the cilantro, mint, and salt, and pound and blend well. Transfer to a bowl or glass jar. Add the oil, vinegar, and sugar and mix well. Alternatively, using a spice grinder, grind the cumin seed. Transfer to a bowl or glass jar and stir in the herbs and salt, pressing the herbs with the back of a spoon to crush them. Add the oil, vinegar, and sugar and mix well. Let stand in a cool place, well sealed for up to 24 hours to allow the flavors to blend.

To prepare the salad, stir the yogurt into the dressing. Transfer to a medium-sized bowl, and add the carrots and pepper to taste. Toss to coat the carrots well. The salad can be served immediately or refrigerated for up to two hours; bring to room temperature before serving. To serve, make a bed of leaf lettuce on a medium-sized plate, and mount the carrots onto the lettuce.

Yield: 6 servings
Estimated Start-to-Finish Time: Not given
Actual Start-to-Finish Time: 1 hour (not counting time for the dressing to marinate)
Substitutions: We sauteed/steamed the carrots with a bit of water in a skillet with a lid on it. The original recipe said to steam the carrots for five minutes, but we found that they were still very crispy at this stage. The Gastronomer likes her carrots pretty soft, so we ended up cooking them much longer.

Sunday, November 6, 2011

Sweet Potato, Chipotle, and Apple Soup

Sweet Potato, Chipotle, and Apple Soup

As noted previously on the blog, for the Gastronomer's 28th birthday present I promised her a set of five extravagant home-cooked meals. A year before I had given her a similar gift and followed through with all five meals; however, this time after meal #2 she decided that she no longer wanted to spend her Saturdays alone while I slaved away in the kitchen on three- and four-course feasts. She requested that I put the meals on hold. I had come up with some awesome menus which featured recipes from a number of never-before-used cookbooks (our collection is growing faster than we can keep up), so I decided to make the dishes one-by-one on different days.

This soup was supposed to be part of a winter-themed menu. Its flavor was awesome--I'm not a big soup eater, but I was really into it. Additionally, it provided a great opportunity to try the immersion blender that we received as a wedding present [Thanks Diana!]. I skipped the step in the original recipe which called for garnishing with deep-fried tortilla strips, but the soup did go well with some yellow corn tortilla chips we had on hand. Tossing in crumbled up chips made it a bit more substantial--otherwise it was pretty ethereal. I had expected a creamy soup and was surprised by how thin it was.

Recipe from Food & Wine 2009 Annual Cookbook.
  • 2 tablespoons vegetable oil
  • 1/2 medium white onion, finely chopped
  • 2 garlic cloves, smashed
  • 1 teaspoon finely grated fresh ginger
  • 2 Gala apples—peeled, seeded and coarsely chopped
  • 1 celery rib, thinly sliced crosswise
  • 1 3/4 pounds sweet potatoes, peeled and thinly sliced
  • 1 quart chicken stock or low-sodium broth
  • 3 cups water
  • 1 small canned chipotle in adobo sauce, seeded and minced
  • salt and pepper
  • 1/2 teaspoon cinnamon
  • 1/2 teaspoon sugar
  • Corn tortilla chips
In a medium soup pot, heat the oil until shimmering. Add the onion, garlic and ginger and cook over low heat, stirring, until softened, about 7 minutes. Add the apples and celery and cook for 5 minutes. Add the sweet potatoes and cook for 5 minutes. Add the chicken stock and water and bring to a boil. Cover partially and simmer over low heat until the fruit and vegetables are very tender, about 45 minutes. Stir in the chipotle.

Puree the soup in the pot using an immersion blender, or transfer it in batches to a normal blender to puree until smooth. Season with 1/4-1/2 teaspoon salt and 1/4 teaspoon pepper.

In a small bowl, mix the cinnamon and sugar with 1/2 teaspoon of salt. Sprinkle over the individual bowls of soup and garnish with broken tortilla chips.

Yield: 6 servings
Estimated Start-to-Finish Time: 1 hour 20 minutes
Actual Start-to-Finish Time: 1 hour 50 minutes
Substitutions: I bought a 1-inch nub of ginger and used it all--you can't have too much ginger if you ask me. I also threw in an extra garlic clove. As noted above, I skipped the step which involved deep-frying tortilla chips in vegetable oil. It didn't seem worth the hassle.

Tuesday, June 28, 2011

Pear and Raspberry Crumble

Pear and Raspberry Crumble

As I mentioned previously, The Gastronomer tends to acquire cookbooks at a faster rate than she can try out the recipes. Last year, I decided to help her out by attempting at least one dish from each of the neglected books. At the time, this task appeared quite feasible, but since then our collection has swelled by a factor or two or three, and it seems that our cooking progress may never catch up. In any case, one of the cookbooks we received was entitled "Ready, Steady, Spaghetti: Cooking for Kids and with Kids." As we are not kids and rarely cook with them, this book was an excellent candidate to gather dust on the bottom bookshelf, but I resolved to find a recipe suitable for adults and give it a whirl.

This crumble caught my eye, as desserts containing raspberries often do. Being from a children's cookbook, the recipe was quite simple and straightforward; fortunately, this is just how a crumble recipe should be. I served it as a fruity, sweet conclusion to the meal that started with smoked mackerel pate and Filipino pork adobo, and it turned out fantastically. The only downside I could foresee from the perspective of cooking with kids is that the most labor-intensive part of the preparation was peeling and cutting the pears: not the most child-friendly kitchen task. Still, it's hard to find a recipe for which kids can really do all the steps independently, and this one is easy and yields a delicious end product.

Recipe from Ready, Steady, Spaghetti: Cooking for Kids and With Kids.
  • 6 large pears
  • 2 tablespoons sugar
  • 3 star anise (optional)
  • 1 cup raspberries
  • 1 cup all-purpose flour
  • 1/2 cup light brown sugar
  • 2/3 cup unsalted butter, cut into cubes
  • ice cream, to serve
Preheat the oven to 375 degrees F. Peel, quarter, and core the pears, then cut each piece in half lengthwise. Put into a large saucepan and sprinkle with the sugar. Add 1 tablespoon of water and the star anise. Cover and bring to a boil.

Cook, covered, over medium-low heat for 10 minutes, stirring occasionally, until the fruit is tender but still holds its shape. Drain the pears and discard the star anise. Transfer to a large ovenproof baking dish or six 1-cup ramekins. Sprinkle the raspberries over the pears.

Combine the flour, sugar, and butter in a bowl. Use your fingertips to rub the butter into the flour, until the mixture resembles coarse bread crumbs. Sprinkle over the fruit, then bake for 20 to 25 minutes, until golden brown. Leave for 5 minutes, then serve with ice cream.

Yield: 6 servings
Estimated Start-to-Finish Time: Not given
Actual Start-to-Finish Time: 1 hour 20 minutes

Saturday, June 18, 2011

Filipino Pork Adobo

Pork Adobo

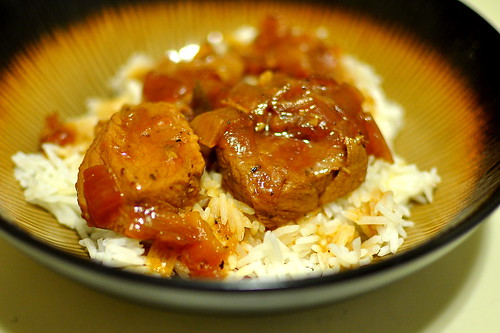
When I was drawing up the menus for The Gastronomer's 28th birthday meals back in February 2010, this recipe seemed like an ideal introduction to the "complete world of pork." It seemed straightforward and not too intimidating, and it was hard to imagine how it could fail to be delicious. Then last summer I was introduced to the wonderful pork adobo from Los Angeles's first Filipino food truck, The Manila Machine, and I became even more excited to try making Filipino-style adobo myself.

I managed to buy the Boston butt already chopped up as "stew meat", which made the prep a breeze. The adobo was a hit with the birthday girl, and I enjoyed feasting on it for lunch for the remainder of the week.

Recipe from Bruce Aidells's Complete Book of Pork.
  • 2 lbs boneless Boston butt, cut into 3-inch chunks
  • 1/2 cup rice or white vinegar, or more to taste
  • 3/4 cup light soy sauce
  • 1/4 Asian fish sauce (I used Squid brand, The Gastronomer's family's favorite)
  • 2 cups homemade chicken stock or canned low-sodium chicken broth or water
  • 2 teaspoons brown sugar, or more to taste
  • 2 teaspoons freshly ground black pepper
  • 4 bay leaves
  • 5 tablespoons chopped garlic
  • 2 onions, thinly sliced
  • 1 teaspoon Asian hot chili oil, or less/more to taste (I used Sriracha)
Put the pork and all of the remaining ingredients in a casserole or large saucepan and bring to a simmer over medium heat. Cook, uncovered, until the pork is tender, about 1 1/4 hours. Skim and discard the fat from the surface. Taste the broth and add more vinegar, sugar, or chili oil to balance the flavors to your liking. Serve the adobo over jasmine rice.

Yield: 4-6 servings
Estimated Start-to-Finish Time: Not given
Actual Start-to-Finish Time: 1 hour 45 minutes (30 minutes of active time)

Wednesday, April 6, 2011

Smoked Mackerel Pate with Apple and Lime

Smoked Mackerel Pate with Apple and Lime

A new cookbook for The Gastronomer to review arrives at our doorstep at least once a month; thus over the past couple of years we have acquired a rather impressive recipe library. With such bounty in our bookshelves, it was pretty tough deciding on 15-20 dishes to make for her 2010 birthday present. With the exception of the Susanna Foo trifecta that I prepared for Meal #1, I resolved to go for diversity and make no more than one dish from each cookbook. I also stayed away from my old friend The America's Test Kitchen Family Cookbook--it was time to test myself with less user-friendly recipes.

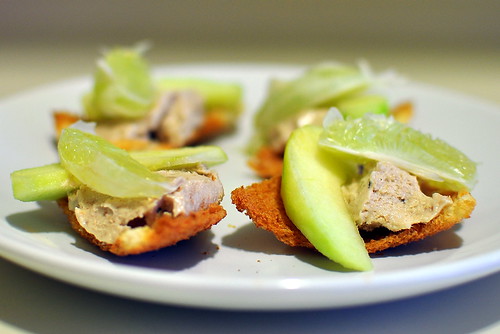
Indeed, this recipe proved to be a bit of a challenge--making the pate was a breeze, but splitting the pieces of toast in half without breaking them was tricky, as was peeling the lime and separating the wedges without having them fall apart. As it turned out, a whole slice of lime on each toast section was way too much sourness for our tastes anyway, so we ended up eating most of the sections with small pieces of shredded lime that were the unfortunate byproducts of my initial peeling/separation efforts. The pate on its own was delicious--I'll definitely make it again.

Recipe from Appetizers by Shane Osborn.

For Pate
  • 5 oz smoked mackerel (skin removed)
  • 5 tablespoons unsalted butter, softened
  • salt and pepper
  • juice of 1/2 lime
For Serving
  • 2-3 thin slices of white bread
  • 1 Granny Smith apple
  • 1 lime
Make Pate

Put the fish into a food processor and process briefly to a paste, about 30 seconds. Add the softened butter and process again until smooth, about 30 seconds. Transfer the mixture to a bowl. Season with salt and pepper, and add half of the lime juice, to taste (reserve the rest of the lime juice for the apple).

Make Melba Toasts and Serve

Preheat the oven to 375 degrees. Heat the broiler (unless you prefer to use the toaster). Toast the bread slices until lightly colored on both sides. Cool slightly, then remove the crusts and cut each slice horizontally in half. Rub with your fingers to remove loose crumbs. Cut into quarters, then halve each toast to make wafer-thin triangles. Place on a baking sheet. Leave in a warm place for 10 minutes to curl, then bake until crisp, about 10 minutes. Let cool.

Peel, halve, and core the apple. Cut into very thin slices and toss in the reserved lime juice to prevent discoloration. Peel the lime, removing all pith, then cut the sections from the membrane. Place a generous spoonful of fish pate on each melba toast triangle and top with an apple slice and a lime section.

Yield: 16 toast sections
Estimated Start-to-Finish Time: Not given
Actual Start-to-Finish Time: 35 minutes
Substitutions: The original recipe called for smoked eel (which alas, I couldn't find) but listed smoked mackerel as an acceptable substitution. I used Blue Hill Bay peppered mackerel from Whole Foods. Since the mackerel was already nicely seasoned, I didn't add any salt or pepper to the pate. The recipe suggested to bake the Melba toasts for 10 minutes, but I burned my first batch, and ultimately found that ~6 minutes was more appropriate with the bread I was using.

Sunday, March 13, 2011

Homemade Noodles with Pork from Shanxi

Homemade Shanxi Knife Cut Noodles

In my first post about The Gastronomer's 2010 birthday meals, I mentioned that I was trying to seek out recipes that would that would push my limits as a cook. Making knife-cut Chinese noodles from scratch certainly qualifies. This recipe definitely has the potential to achieve the ideal Chinese noodle texture, although mine were a bit too square and thick. Next time I'll roll the dough out thinner. The pork mixture is awesome and could be served over fettuccini or linguine if you're not feeling so ambitious. I'm going to try making this one more time to perfect the consistency of the noodles, and then it's going onto the Brightest Stars list for sure!

Recipe by Susanna Foo Chinese Cuisine

For Noodles
  • 3 cups all-purpose flour
  • 1 cup cold water
  • 1 tablespoon corn oil
For Topping
  • 1 pound boneless lean pork, cut into 1/4-inch dice (this will retain its moisture when cooked better than finely ground meat)
  • 3 tablespoons soy sauce
  • 1 tablespoon corn starch
  • 3 tablespoons corn oil
  • 1/4 cup finely chopped onion
  • 3 garlic cloves, thinly sliced
  • 3 tablespoons brandy
  • 1 large russet potato, peeled and cut into 1/4-inch dice
  • 2 cups chicken stock
  • 2 large tomatoes, peeled and diced
  • 2 scallions, chopped
  • coarse salt
  • freshly ground pepper
Make Noodles

Place the flour in a large bowl and make a well in the middle. Pour the water into the well, stirring to incorporate the flour. Turn out onto a lightly floured work surface and knead by hand until smooth, about 5 minutes. Alternately, place the flour in a food processor and, with the motor running, add the water. Process until smooth, about 3 to 5 minutes.

Place the dough in a large bowl and cover with a damp towel, then loosely cover with a piece of plastic wrap and set aside at room temperature for 1 to 2 hours so the gluten in the dough relaxes.

Lightly flour the work surface and roll out the dough into a 1/4-inch-thick rectangle (or slightly thinner--I found that 1/4-inch x 1/4-inch noodles were a bit too thick). Sprinkle the surface of the dough lightly with flour and fold the rectangle in half to form another smaller rectangle. With a sharp knife, cut the dough into 1/4-inch wide strips. Place the noodles on a baking sheet. Sprinkle them lightly with flour and separate them with your hands. Cover with a towel.

Bring a large pot of water to boil, then add the oil and half of the noodles. Cook for 3 to 5 minutes, tasting one noodle to make sure the center is cooked but still firm to the bite. When the noodles are cooked, scoop them out of the water with a Chinese strainer or slotted spoon and place in a colander to finish draining. Repeat with the remaining noodles. Serve immediately.

Make Topping

While the dough is relaxing, begin preparing the topping. Place the diced pork in a large bowl and mix in the soy sauce and the cornstarch. Add 2 tablespoons of the oil, mix well, and marinate for a few minutes at room temperature while preparing the rest of the ingredients.

Heat 1 tablespoon of the oil in a large, heavy saucepan or Dutch oven. Add the onion and garlic and cook over high heat, stirring, until the onion is lightly browned, 2 to 3 minutes.

Add the pork, along with any marinade, and continue to cook, stirring, until the pork is no longer pink. Add the brandy. Cover the pot, turn the heat to medium and cook for about 10 minutes. Add the potato and mix well. Pour in the stock, cover, and cook for 30 minutes, or until the pork and potatoes are completely cooked.

Add the tomatoes and the scallions. Continue to cook, stirring often, for 3 minutes more, or until the sauce is thickened. Season with salt and pepper to taste. Spoon the pork sauce over the freshly cooked pasta and serve along with small bowls filled with any or all of the following optional garnishes: balsamic vinegar, chopped fresh jalapeno peppers, julienned cucumber, chopped fresh basil, chopped fresh cilantro, and julienned leeks.

Yield: 4-6 servings
Estimated Start-to-Finish Time: Not given
Actual Start-to-Finish Time: 3 hours

Monday, February 14, 2011

Cold Marinated Scallops

Susanna Foo's Cold Marinated Scallops

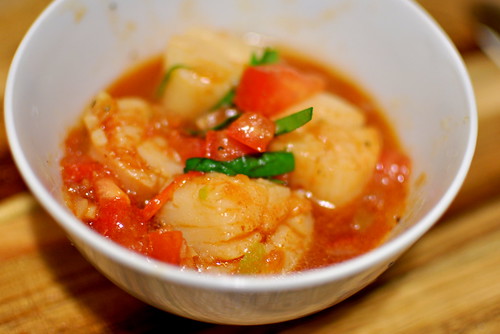
Susanna Foo Chinese Cuisine is well on its way to becoming the second unofficial cookbook of Stellar Recipes, joining the ever-reliable America's Test Kitchen Family Cookbook. Before serving poached pears for dessert during the first of The Gastronomer's 2010 birthday dinners, I made these scallops as a starter. Despite not being a tomato lover, I found them to be quite delicious, but The Gastronomer later told me she thought they were a bit too oily. Nevertheless, it's a very interesting recipe--I had never cooked with Bloody Mary mix before, and certainly never thought of mixing it with ginger, scallions, etc.

Recipe by Susanna Foo Chinese Cuisine
  • 1 pound medium sea scallops
  • 1/2 cup corn oil
  • 1 tablespoon fresh lemon juice
  • 1/4 cup diced onion
  • 1 tablespoon peeled, grated ginger root
  • 1/2 cup scallions, white part only, diced (about 3)
  • 1 small tomato, diced
  • 1/2 cup bottled Bloody Mary mix
  • Coarse salt
  • Freshly Ground Pepper
  • 1/4 julienned basil or cilantro leaves
Wash the scallops and pat dry. Place them in a single layer between sheets of paper towels until they are completely dry.

Heat the oil in a large skillet over high heat. When the oil is hot but not smoking, about 300 degrees F, add the scallops. Cook, turning, until the scallops are just cooked, about 3 minutes. Do not overcook, or they will toughen.

Using a slotted spoon, remove the scallops to a strainer and drain. Place them in a bowl, toss with the lemon juice, and refrigerate.

Remove all but 1 tablespoon of oil from the skillet and lower the heat to medium. Add the onion, gingerroot, and scallions. Cook, stirring, for 2 minutes. Turn off the heat, add the tomato and Bloody Mary mix, and stir to combine. Let the sauce cool.

Just before serving, drain the scallops. Spoon the sauce over them and toss to combine. Season to taste with salt and pepper. Garnish with the julienned basil or cilantro leaves and serve immediately.

Yield: 6 servings
Estimated Start-to-Finish Time: Not given
Actual Start-to-Finish Time: 2 hours

Sunday, February 6, 2011

Arugula and Edamame Crostini

Arugula and Edamame Crostini

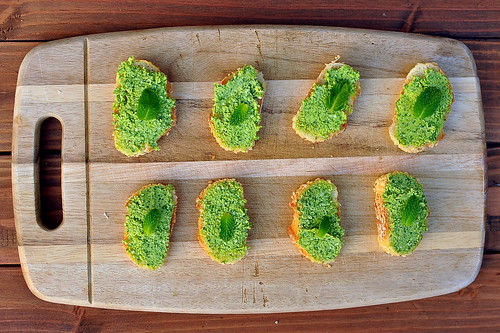
One more from the CSA box--The Gastronomer did most of the work preparing this one, but the honor of blogging about it has fallen to me. We don't like arugula enough to use up a whole bunch in salads, so this recipe was a great alternative. The bitterness/bite of the green is actually quite nice in a spread, and I thought the mint garnish was an excellent touch. The recipe doesn't actually use all that much arugula, so we had to make it twice. Not a problem--I enjoyed having the crostini as an appetizer many nights in a row.

Recipe by Gourmet, May 2009, courtesy of Epicurious.
  • 1 cup shelled fresh or frozen edamame (soybeans; 3/4 pounds in pods)
  • 1/4 cup plus 1 tablespoon extra-virgin olive oil, divided, plus additional for drizzling
  • 1 1/2 cups packed baby arugula (1 1/2 ounces), divided
  • 3 tablespoons grated Pecorino Toscano or Parmigiano-Reggiano
  • 1/4 teaspoon grated lemon zest
  • 1/2 teaspoon fresh lemon juice
  • 1 baguette
  • 1 garlic clove, halved crosswise
  • 16 mint leaves
Preheat oven to 350°F with rack in middle.

Cook edamame in boiling water, uncovered, until tender, 3 to 4 minutes, then drain and transfer to an ice bath to stop cooking.

Pulse edamame in a food processor until very coarsely chopped, then transfer half of mixture to a large bowl. Add 1/4 cup oil, 1/2 cup arugula, cheese, lemon zest and juice, 1/2 teaspoon salt, and 1/8 teaspoon pepper to soybeans in processor and purée until smooth. Add to bowl. Coarsely chop remaining cup arugula and gently fold into edamame mixture.

Cut 16 diagonal slices (1/3 inch thick) from baguette and put in a 4-sided sheet pan. Drizzle with remaining tablespoon oil. Bake until pale golden and crisp, 8 to 10 minutes. Rub with cut side of garlic.

Spoon edamame mixture onto baguette toasts, then drizzle with oil and top with mint.

Yield: 8 servings
Estimated Start-to-Finish Time: Not Given
Actual Start-to-Finish Time: 40 minutes

Friday, January 21, 2011

Stuffing with Red Mustard Greens

Stuffing with Red Mustard Greens

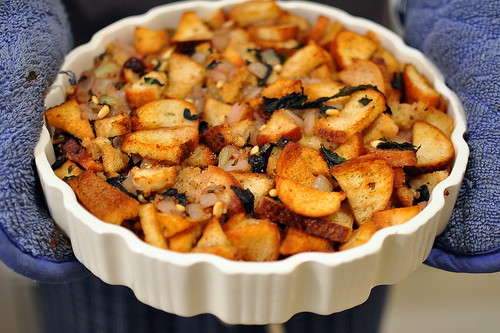
After valiantly cooking our way through our leafy CSA box for a solid week, we had used up the bok choy, tatsoi, Siberian kale, broccolini, romaine, arugula, turnip, radishes, and cilantro, but one stubborn vegetable remained. With their shockingly intense horseradish-like flavor, red mustard greens are a fascinating item, but not one that I would want to put in my mouth on a regular basis. The Gastronomer and I couldn't imagine a dish that they wouldn't ruin. Nevertheless, we had come this far and didn't want to waste anything, so I scoured the internet and found this stuffing recipe.

I was rather terrified to taste it when I finished, but was pleasantly surprised when I did. It was truly an excellent stuffing, with plenty of satisfying flavor despite the omission of sausages or the like. The taste of the greens was significantly tempered by cooking, and the raisins (which I used instead of currants) added a nice sweet balance. If you ever find yourself in the possession of some red mustard greens and wasabi is your thing, then by all means use them in a salad--otherwise, this recipe will do quite nicely for a mild alternative.

Recipe by Bon Appetit, November 2009, courtesy of Epicurious.
  • 1 1-pound loaf pain rustique or other rustic country-style bread
  • 2 tablespoons extra-virgin olive oil
  • 2 garlic cloves; 1 pressed, 1 minced
  • 4 tablespoons (1/2 stick) butter, divided
  • 1/3 cup pine nuts
  • 2 cups chopped onions
  • 6 cups coarsely chopped stemmed red mustard greens
  • 1 tablespoon chopped fresh thyme
  • 2 cups turkey stock or low-salt chicken broth
  • 1/3 cup dried currants
  • 1/2 teaspoon finely grated lemon peel
Position rack in center of oven and preheat to 375°F. Cut bottom crust and short ends off bread and discard. Cut bread into 3/4- inch cubes; place in large bowl. Whisk oil and pressed garlic clove in small bowl. Add to bread cubes; toss to coat. Spread bread cubes in single layer on large rimmed baking sheet; sprinkle with salt and freshly ground pepper. Bake until slightly crunchy, stirring occasionally, about 15 minutes. Cool slightly, then return to same large bowl.

Generously butter 13 x 9 x 2-inch glass baking dish. Melt 1 tablespoon butter in heavy large skillet over medium heat.

Add pine nuts; stir until golden, about 2 minutes. Add to bowl with bread cubes. Melt remaining 3 tablespoons butter in same skillet over medium-high heat. Add onions; sauté until brown, about 10 minutes. Add mustard greens, thyme, and minced garlic; sauté until greens are wilted and tender, 3 to 4 minutes. Transfer to bowl with bread cubes. Add 2 cups stock to same skillet; boil until reduced to 1 cup, about 5 minutes. Pour stock over bread mixture and toss. Mix in currants and lemon peel. Season with salt and freshly ground black pepper. Transfer stuffing to prepared baking dish.

Preheat oven to 350°F. Bake stuffing uncovered until heated through and starting to brown on top, 20 to 30 minutes. Let stand 5 minutes and serve.

Yield: 6-8 servings
Estimated Start-to-Finish Time: Not Given
Actual Start-to-Finish Time: 1 hour 20 minutes
Substitutions: I didn't have any lemons on hand and left out the lemon peel--I figured it wouldn't matter too much since 1/2 teaspoon is a pretty small amount of zest to start out with. I also used dried thyme instead of fresh thyme (1/3 the amount) and raisins instead of currants. I used 2/3 of a leftover French baguette we had for the bread and cut down the other proportions accordingly.

Monday, January 17, 2011

Soba with Cilantro Pesto, Tofu, and Pickled Radishes

Soba with Cilantro Pesto, Tofu, and Pickled Radishes

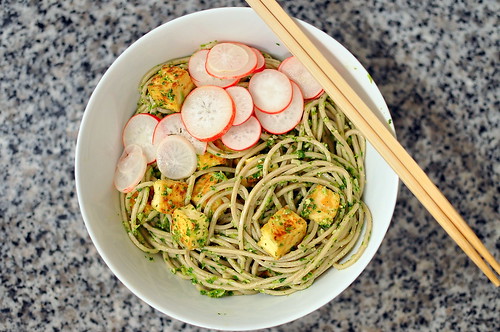
One night last week, I was all set to make mixed herb pesto with the bunch of parsley from our CSA box and the basil I had purchased at Trader Joe's the day before. Suddenly, as I was washing the parsley, something didn't smell right. I brought the bunch a bit closer to my nose. Sure enough, it wasn't parsley after all--it was cilantro! I didn't think basil and cilantro would go together too well, so I went ahead and made the pesto using basil alone. Unfortunately, when I finished I was still stuck with a dripping wet bunch of cilantro without a home. It occurred to me that maybe I could make some sort of pesto with the cilantro as well. A quick search on Epicurious paid dividends, as I came across this Asian pesto recipe, which turn out to be excellent.

The day after I made the pesto, The Gastronomer stir-fried some tofu, prepared a box of soba noodles, and topped the whole thing off with the radishes from our CSA box, which she had brilliantly decided to pickle Vietnamese-style. It was a stellar meal all around.

Recipe adapted from Gourmet, November 2004, courtesy of Epicurious.
  • 2 cups packed fresh cilantro leaves
  • 3 tablespoons pine nuts
  • 1 clove garlic
  • 3 tablespoons olive oil
  • 1 tablespoon fresh lime juice
  • 2 teaspoons Asian fish sauce
  • 1 teaspoon Asian sesame oil
  • 1 teaspoon sugar
  • 1/2 teaspoon salt
  • 1/8 teaspoon black pepper
Purée ingredients in a food processor until bright green and smooth, about 1 minute.

Yield: Pesto covers about 4 servings of pasta
Estimated Start-to-Finish Time: Not given
Actual Start-to-Finish Time: 20 minutes (for the pesto alone)
Substitutions: I added garlic and extra pine nuts and reduced the amount of olive oil from that specified in the original recipe. If you like your pesto oily, add a bit more.

Monday, January 10, 2011

Braised Turnip Greens with Turnips and Apples

Braised Turnip Greens with Turnips and Apples

Although we appreciate fresh local produce and support small family farms in theory, The Gastronomer and I have a notoriously poor track record when it comes to finding our way to farmer's markets on the weekends. Thus I recently decided it was time for us to try a Community Supported Agriculture delivery program. When Christmas came around, along with the hilarious new Stuff White People Like book, I gave The Gastronomer a present to help us be better white people: a subscription to the South Central Farmers CSA co-op. As part of the gift, I promised that I would take charge of figuring out what to do with the bi-weekly bounty of fruit and vegetables.

I picked up our first box at a local church on the Sunday after New Years. We were excited to open it--I expected to find a variety of beautiful winter produce: apples, oranges, squash, brussels sprouts, kale, etc. What we got was a truly staggering quantity of leafy greens, and little else. The lone elements of color in the box came from a large turnip and a bunch of small radishes. It was a bit disappointing, and quite intimidating trying to imagine how we would ever find a way to use it all.

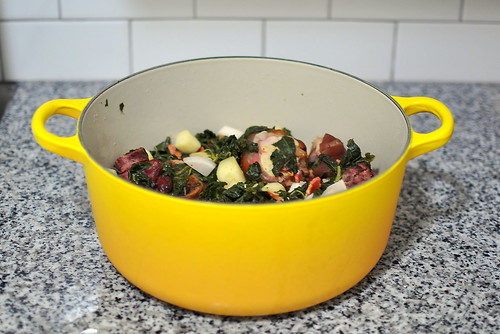
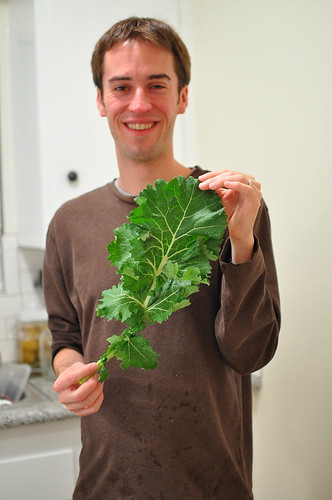
After a bit of research, we had identified all but one of the vegetables in the box, and had started to come across some enticing recipes. I started my farm-fresh cooking adventure by using the turnip and its greens in this recipe. It turned out to be a really fantastic way to get our vitamins while beginning to make a dent in the pile of greenery on our kitchen table. To reach something close to 2 lbs of greens, I added our entire stash of the mystery vegetable, which looked something like green chard but lacked its thick white stem.To help resolve the mystery of the leaf's identity, I'm breaking with tradition and publishing a Stellar Recipes post with two photos.

Mystery Green

Any ideas?

Recipe adapted from Gourmet, November 2009, courtesy of Epicurious.
  • 2 pounds turnip greens or other braising greens (kale, collards, etc.), tough stems discarded and greens torn into small pieces
  • 1 (3/4-to 1-pound) ham hock, rinsed
  • 3 1/2 cups water
  • 3 Gala apples
  • 1 1/4 pounds turnips, peeled and cut into 1/2-inch pieces
  • 2 teaspoons cider vinegar
  • 2 teaspoons sugar
  • 2 tablespoons unsalted butter, cut into pieces
Bring greens, ham hock, water, and 1/4 teaspoon salt to a boil in a large heavy pot. Reduce heat to low and simmer, covered, stirring occasionally, until greens are almost tender, about 20 minutes.

Meanwhile, peel apples and cut into 1/2-inch pieces.

Add turnips and apples to greens with vinegar, sugar, and 1/2 teaspoon each of salt and pepper and cook at a bare simmer, covered, stirring and turning ham hock occasionally, until turnips and apples are tender but not falling apart, about 20 minutes more.

Remove from heat and strain the liquid from the pot into another saucepan. Boil the liquid to reduce it to 1/3 or 1/4 of its original volume, then pour it back into the original pot with the greens. Stir in butter and salt to taste.

Remove ham hock and finely chop any tender meat, discarding skin, bone, and tough meat. Add chopped meat to pot.

Yield: 8 servings
Estimated Start-to-Finish Time: 1 hour
Actual Start-to-Finish Time: 2 hours. It took me forever to wash and tear up the huge quantity of greens--being fresh from the farm, they were quite dirty.
Substitutions: Boiling away some of the liquid was suggested by several reviewers on Epicurious. The dish would have been awfully watery otherwise.
Related Posts with Thumbnails